Equipment

2279 products
View:
  • Selected: 0
    Applying
    Loading...
  • Selected: 0
    Names
    Loading...
  • Selected: 0
    Manufacturer
    Loading...
  • Selected: 0
    Made in
    Loading...
  • Selected: 0
    Additional
    Loading...
All filters
  • 24
    Applying
    Loading...
  • 393
    Names
    Loading...
  • 124
    Manufacturer
    Loading...
  • 56
    Made in
    Loading...
  • 90
    Additional
    Loading...
View:
2279 products
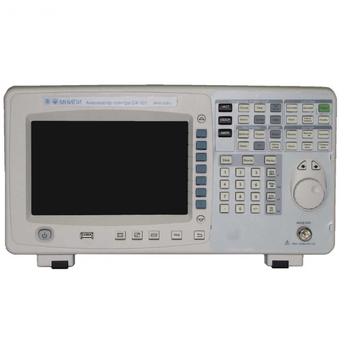
Low-frequency signal generator G3-132
Technical specifications: The waveform is sinusoidal, rectangular (TTL) Frequency range from 0.1 Hz to 10 MHz Frequency setting error ±0.02% Frequency instability ±0.01% in 15 min Signal amplitude ± 2.5 V at 50 ohm load ±5 V without load Limits of adjustment of the output signal level from 2 mV to 1.85 V (skz) at a load of 50 ohms from 4 mV to 3.75 V (scz) without load Signal level unevenness ± 5% at frequencies from 0.1 to 10 Hz relative to 1 kHz ± 2% at frequencies from 10 Hz to 1 MHz ±10% at frequencies from 1 to 10 MHz Harmonic coefficient ± 0.2% at frequencies from 10 to 100 Hz ±0.07% at frequencies from 100 Hz to 20 kHz ± 0.2% at frequencies from 20 to 120 kHz ±1% at frequencies from 120 kHz to 1 MHz ±4% at frequencies from 1 to 10 MHz Parameters of the rectangular (TTL) signal form log. "1" 3 2.4 V; log. "0" ≤ 0.4 V In the frequency range from 0.1 Hz to 2 MHz, the duration of the front, the cutoff is not more than 100 ns Operating temperature range from minus 10 °C to + 40 °C Power supply ~230 V, 50 Hz; 10 V×A Dimensions; weight 210×71×255 mm; 2 kg
MNIPI
Minsk
Produced in: Belarus, Minsk
Anemometer AP1M with cup sensor AP1M2
from 47 332 ₽
Range: 0.8-20.0 m/s; Accuracy characteristics: PG±(0.3+0.05V) m/s; The power is supplied from a 4.8 V battery. The power consumption is 0.1 VA. Application conditions: For primary measuring transducers: from minus 30C to plus 50C in the range of 1.0–20.0 m/s; For digital measuring console: from minus 10C to plus 50C; Relative humidity 45-80% at temperature (25±10)With; Continuous operation time at negative temperatures up to minus 30C is no more than 1 hour.
EMPGGO
Saint Petersburg
Produced in: Saint Petersburg
Spectrophotometer UV-VIS PB2201
1 supp.
Measuring functions Measurement of absorption, transmission, and reflection spectra Measurement of optical density, transmission coefficient and reflection coefficient at fixed wavelengths Determination of concentration at one, two, three wavelengths by factor, standard, schedule Multi-wave kinetic measurements Determination of concentration by programmed methods Calculation of color and chromaticity coordinates UVI spectrophotometers "SOLAR" operate in the ultraviolet, visible and near infrared regions of the spectrum. They are used in scientific laboratories, healthcare institutions, veterinary medicine, pharmaceuticals, ecology, biology, etc., in laboratories for quality control of products and raw materials in various sectors of the economy (industrial enterprises, agriculture, food industry, etc.) Removable cuvette holders and set-top boxes Accurate measurements Cost-effectiveness Touch screen Built-in printer Software support
SOLAR
Minsk
Produced in: Belarus, Minsk
UNM-300/2000 portable magnetizing device
The principle of operation of the magnetic particle flaw detector: The device provides monitoring and detection of surface defects by the applied field method or by the residual magnetization method. The kit with the device includes power cables, remote solenoids, and an electromagnet, with which you can produce longitudinal or circular magnetization of the part. A trolley is provided for the transportation of technical equipment and the detection of defects in the field. Magnetization is carried out by alternating, direct or pulsed current of large magnitude, due to which high values of the magnetizing field strength are achieved. Features and advantages of the UNM-300/2000 magnetic powder control device: Microprocessor control, which allows you to memorize and accurately reproduce the desired modes and selected measurement parameters, as well as work as part of automated stands and control systems; The magnetizing device has a digital indicator on the front side and a control panel for selecting the operating mode, type and current strength; Automatic recognition of the type of connected external magnetizing device; Device temperature control and automatic shutdown in case of overheating; Remote connected magnetization devices allow you to control the quality of parts and assemblies of complex shape; Automatic demagnetization of controlled assemblies and parts; The equipment meets the requirements of the following standards: GOST R 56512-2015, GOST R 53700-2009 (ISO 9934-3:2002), GOST R 50.05.06-2018, GOST R ISO 10893-5-2016, GOST ISO 17638-2018, RD 34.17.102-88 and RD-13-05-2006; Devices of the MANUL series (UNM-300/2000 and others) are approved for use by the Russian Railways. Scope of application: Magnetic particle flaw detection is indispensable where quality control of various critical and loaded assemblies and parts is required, detection of surface defects that occur during their production, storage and operation. The device may be in demand: at factories for the production and repair of automotive, aviation and railway equipment, metro enterprises, military-industrial complex (inspection of shafts, axles, wheel pairs, pistons, beams, springs, etc.); in civil and military shipbuilding, elevator and crane enterprises (control of rigging equipment, hooks, etc.); at pipe rolling plants (determination of defects in rolled products); in the oil and gas, chemical industry (inspection of welds of equipment operating under pressure). The UNM-300/2000 portable magnetic particle flaw detector has a relatively small weight and dimensions, which allow it to be used as a stationary or portable device in specialized quality control laboratories or in ordinary workshops, garages, hangars, locomotive depots or warehouses. The UNM 300/2000 device, as well as other means of magnetic powder control, are normally used together with auxiliary equipment for the preparation and application of magnetic powder (suspension), for fixing the indicator pattern, magnetometers for determining residual magnetization, visual inspection means – magnifiers and endoscopes, as well as with ultraviolet irradiators in the case of fluorescent powders. Technical specifications Magnetization currents Variable, Pulse, Rectified (only for solenoid and electromagnet) The measurement error of the magnetization current is no more than 10%. characteristics of the pulse current The repetition frequency of unipolar current pulses during magnetization and of multipolar current pulses during demagnetization is (2 ± 0.2) Hz. The duration of the current pulses is at least 1.5 ms. Magnetic characteristics of the solenoid The maximum alternating magnetic field in the center of a single solenoid is at least 100 A/cm. The maximum alternating magnetic field on the axis in the center between two solenoids located at a distance of 200 mm is at least 60 A/cm. The maximum permanent magnetic field in the center of a single solenoid is at least 80 A/cm. The maximum permanent magnetic field on the axis in the center between two solenoids located at a distance of 200 mm is at least 50 A/cm. Values of magnetization currents The maximum alternating magnetization current in the unwound cable 6 m × 50 mm2 and on the electrical contacts is at least 1000 A. The maximum pulse magnetization current in an unwound cable of 4 m × 10 mm2 and on electrical contacts is at least 2000 A. The current adjustment range in the solenoids and the electromagnet is from 0.5 to 4.5 A. Characteristics of the electromagnet The maximum alternating magnetic field in the air gap of the electromagnet depending on the interpolar distance is as follows: - in the 140 mm gap: at least 75 A/cm; - in the 40 mm gap: at least 300 A/cm. The maximum constant magnetic field in the air gap of the electromagnet depending on the interpolar distance is as follows: - in the 140 mm gap: at least 100 A/cm; - in the 40 mm gap: at least 400 A/cm. Operating mode The operating mode is cyclic: magnetization/pause. The magnetization time is adjustable from 1 to 40 s. The demagnetization time is adjustable from 5 to 60 seconds. Demagnetization of details is performed automatically. The time of setting the operating mode is no more than 15 seconds. The duration of continuous operation is at least 8 hours. Power supply parameters The device is powered by an alternating current network with a voltage of 220 V and a frequency of 50 Hz. The power consumed from the network is no more than 5 kVA. weight and size characteristics Overall dimensions of the device (w × h × d) – no more than 267×245×465 mm. The weight of the device is not more than 50 kg. Other characteristics The average worktime before failure is at least 12500 hours. The average recovery time is no more than 6 hours. The average service life of the device is at least 10 years. Compliance with standards The device fully complies with the requirements of GOST R 56512-2015, GOST R 53700-2009 (ISO 9934-3:2002), GOST R 50.05.06-2018, GOST R ISO 10893-5-2016, GOST ISO 17638-2018, RD 34.17.102-88 and RD-13-05-2006 in terms of the requirements for magnetizing devices and magnetic particle flaw detectors. Identification of the load. It performs automatic identification of the types of connected load: cables, solenoids and electromagnet. Control of the connected load current It allows you to control the current of the connected AC/DC electromagnets and solenoids.
Produced in: Moscow
Oilman's Kit-1
Oilman's Kit-1
from 67 254 ₽
It is designed to measure the temperature during the transportation of petroleum products, namely, to make a temperature correction for the volumetric expansion of petroleum products. The density of petroleum products decreases significantly with increasing temperatures, and the volume of the product increases, the kit "Oilman-1" allows temperature measurements for the subsequent calculation of the volumetric expansion of petroleum products. •
Produced in: Moscow
Frequency meters H3-96
Designed for measuring the frequency and period of sinusoidal and pulse signals, measuring pulse duration, time intervals, pulse duty cycle, frequency ratio of electrical signals, counting the number of pulses, output of reference frequency signals. Technical specifications: Input to (sinusoidal signal) - range 100 - 3200 MHz Input A, C (sine, pulse) - range 0.01 - 200 MHz The number of averages. the period of the input signal is 1 ... 105 Borehole measurement by inputs – 1.000001- 999999999 Frequency ratio in channels: A/S, C/A, B/C and B/A - up to 999999999 Quartz thermostatic generator The nominal frequency value is 5 MHz Error: ± 2•10-8 - in 30 days, ± 5•10-8 - in 12 months Overall dimensions (HXHL) - 345x285x106 mm Weight: 4 kg Reference generator: ±5x10⁻⁸ for 12 months. Operating conditions: - 10° C ... +50° C
MNIPI
Minsk
Produced in: Belarus, Minsk
The BREEZE-3 aspirator
from 62 000 ₽
The aspirator refers to universal, electric, single-channel, portable devices with set volume flow values, with direct measurement of the sampled volume of air samples in accordance with GOST R 51945-2002.
Produced in: Moscow
SM-1 microphone system
The SM-1 microphone system is designed for use in information-measuring acoustic complexes for various purposes. The system uses the principle of converting sound vibrations of the studied objects into proportional electrical signals received by measuring instruments.
VIBROPRIBOR
Yaroslavl
Produced in: Yaroslavl
Metolab 601-01 Brinell Hardness Tester
METOLAB 601-01 is a stationary hardness tester, a modification of the METOLAB 601 device with an expanded configuration and improved technical characteristics. The METOLAB 601-01 hardness tester is designed for high-precision measurements of the specified parameters of various parts and materials (hardened and non-hardened steels, cast iron, non-ferrous metals, soft alloys, etc.). The METOLAB 601-01 device has high accuracy, allows measurements in a wide range and provides high repeatability of results. The main difference from the younger model is the presence in the basic configuration of a digital camera and a disk with software for processing received data on a personal computer. Also, the METOLAB 601-01 device allows you to automatically calculate the hardness value. Due to its characteristics, the stationary Brinell hardness tester METOLAB 601-01 can be used in a wide variety of industries and production, as well as in educational institutions of various levels in the training of specialists. The stationary Brinell METOLAB 601-01 hardness tester is included in the State Register of Measuring Instruments of Russia and comes with a certificate of primary verification (on request). The number in the GRSI is 65684-16. Distinctive features of the stationary METOLAB 601-01 Brinell hardness tester: Software on disk; Digital camera for recording actions by the operator; Automatic or manual capture and fingerprint tracking; Automatic calculation of hardness values; Simple and intuitive interface of the device; Wide range of measured values on the Brinell scale (from 8 to 650 HBW); The presence of an electronic switch of the applied load; Large and bright LCD display; Displaying all necessary service information on the device screen, including exposure time and real load readings; Russian version of the device menu; High accuracy and repeatability of measurement results. Basic package of delivery: Stationary METOLAB 601-01 Brinell hardness tester; Microscope, 20x; Digital camera; Software on CD-ROM; USB key; Indenter with carbide ball (Ø10,0mm; Ø5,0mm; Ø2,5mm) - 1 pc.; Large flat table; Small flat table; V-shaped table; Brinell hardness measures - 1 set; User Manual.
Metolab
Moscow
Produced in: Moscow
Mini press for producing thin layers of substance on steel mirror plates
It is intended for sample preparation when examining samples using an IR microscope and mirror reflection prefixes. Allows you to shape a thin layer (up to several microns) to various objects: polymer fragments, microparticles of LCP, powdery substances, fibers, etc. The resulting thin layers on mirror plates made of alloy steel are investigated by the double transmission method – when the radiation that has passed through the layer of matter is reflected from the surface of the plate and passes through the substance again. The spectra recorded by this method are completely identical to the transmission spectra obtained, for example, after pressing substances with KBr. The advantages in this case are: - speed of sample preparation - there is no need to use hydraulic and manual presses and molds, grinding mortars, etc. - no need to use high-purity KBr or petroleum jelly oil - the sample is not lost and, if necessary, can be examined by other methods - when using an IR microscope, it is possible to “scan” the resulting thin layer to select the most informative area, and also, if the layer is heterogeneous in composition, to obtain the spectral characteristics of its components.
SIMEKS
Novosibirsk
Produced in: Novosibirsk
Wall-mounted smart air probe SZVN
from 10 680 ₽
The wall-mounted amsrt air probe is designed to measure the temperature of gaseous materials without mechanical impurities and aggressive vapors by direct contact of the probe with the measuring object and transmitting the measured value via Bluetooth to devices with the installed ThermoMonitor based on the Android program. Operating conditions of the smart probe SZVN Ambient temperature, °C: -20...+55. Relative humidity, %: not more than 80 at T=35 °C. Atmospheric pressure, kPa: 86...106. Functionality of the smart probe of the SSVN Measurement of physical quantities with a resolution of 0.01. Recording of measured values at intervals from 5 seconds to 23 hours 59 minutes 59 seconds (only smart probes with built-in memory). Transmitting data about measured physical quantities via Bluetooth to a device with the ThermoMonitor. The Android program is installed. Transmitting information about the state of charge of the built-in battery via Bluetooth to a device with the ThermoMonitor. The Android program isinstalled. Automatic transition to sleep mode after 50 seconds. The ability to connect external power. Possibility of calibration.
Produced in: Kolomna, Moscow region
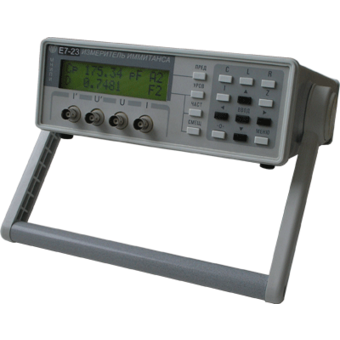
Immitance meter E7-20
Technical specifications: Wide frequency range 25 Hz–1 MHz Capacity (10-15-1) F Inductance (10-11-104) Gn Resistance (10-5-109) Ohms Conductivity (10-11-10) Cm Modulus of complex resistance (10-5-109) ohms Reactance (10-5-109) Om Phase shift angle -90° – +90° Q factor, loss factor 10-4-104 Leakage current (10-8-10-2) A The error is ±0.1% Offset voltage 0 – 40 V (external up to 120 V) Measuring signal level (0.04 – 1) V RS-232C interface Mathematical processing of measurements Dimensions, weight: 127x298x300 mm, 4 kg Power supply ~220 V, 20 VA
MNIPI
Minsk
Produced in: Belarus, Minsk