Language selection
В настоящее время портал работает - ведутся технические работы.
Catalog
Metrology
524 products
View:
- Selected: 0Areas of use
- Selected: 0Item names
- Selected: 0Manufacturer
- Selected: 0Made in
- Selected: 0Additional
View:
524 products
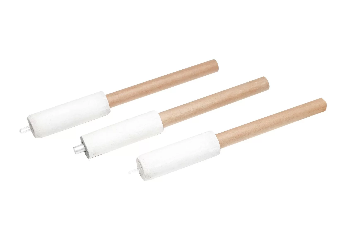
EVRAZTEMP Submersible thermocouples for reusable use
Purpose: Measurement of molten metal temperature
Scope of application: Induction furnaces, blast furnaces, casting ladles
Measuring range: from 600°C to 1800°C
Accuracy: 0 + 3°C at 1554°C
Measurement time: 4 sec
Tube Length: from 100 to 1800 mm (other lengths are available on request)
Slag Cap: Steel, uncapped, aluminum
Number of measurements: 5 or more times
Type of NSH: B, S
EVRAZPRIBOR
Lipetsk
Produced in: Lipetsk
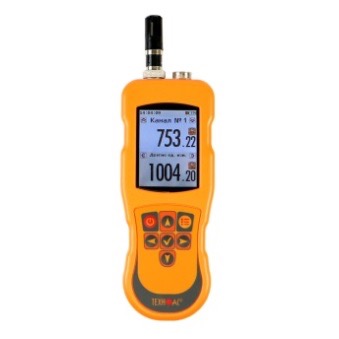
Digital two-channel contact thermometer TK-5.29 with universal inputs and logging function
from
28 800 ₽
The digital contact thermometer TK-5.29 is designed to measure the temperature of liquid, bulk, gaseous materials by immersion of measuring probes of thermometers into the medium (immersion measurements), contact measurements of temperatures of surfaces of solids (surface measurements), measurement of relative humidity of gaseous non-aggressive materials, measurement of atmospheric pressure, measurement of air flow velocity, as well as for measuring the luminous flux incident on a small area of the surface to its area and other physical quantities by sensors with a unified current output.
The contact thermometer TK-5.29, depending on the order, is equipped with replaceable probes for various purposes. A probe of any type can be simultaneously connected to the TK-5.29 thermometer to the 1st channel, a thermal resistance sensor or a sensor with a unified current output of 4 ...20 mA to the 2nd channel.
The TK-5.29 thermometer has the function of automatically determining the type of connected probe.
TEKHNO-AS
Kolomna
Produced in: Moscow
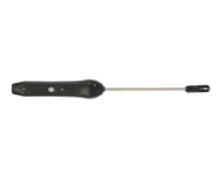
Smart probe of relative humidity and temperature L=150 mm SSVL.150P with built-in flash memory
from
13 740 ₽
The smart probe of relative humidity and temperature L=150 mm with a built-in flash memory is designed to measure the temperature of gaseous materials without mechanical impurities and aggressive vapors, relative humidity by direct contact of the probe with the measuring object and transmitting the measured value via Bluetooth to devices with the installed ThermoMonitor based on the Android program.
Operating conditions of the SZVL.150P smart probe
Ambient temperature, °C: -20...+55.
Relative humidity, %: not more than 80 at T=35 °C.
Atmospheric pressure, kPa: 86...106.
Functionality of the smart probe SSVL.150P
Measurement of physical quantities with a resolution of 0.01.
Recording of measured values at intervals from 5 seconds to 23 hours 59 minutes 59 seconds (only smart probes with built-in memory).
Transmitting data about measured physical quantities via Bluetooth to a device with the ThermoMonitor based on the Android program.
Transmitting information about the state of charge of the built-in battery via Bluetooth to a device with the ThermoMonitor based on the Android program.
Automatic transition to sleep mode after 50 seconds.
The ability to connect an external power supply.
Possibility of calibration.
TEKHNO-AS
Kolomna
Produced in: Kolomna, Moscow region
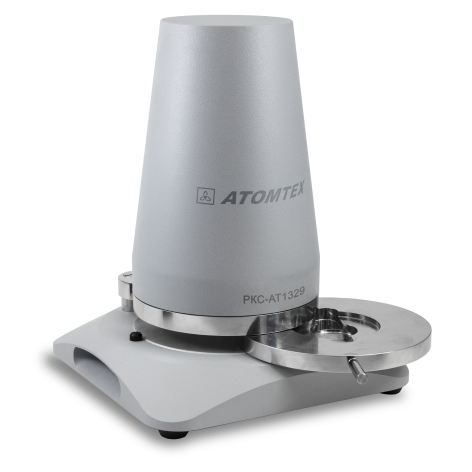
RADIOMETER RKS‑AT1329
The radiometer allows you to:
- measure the total alpha and total beta activity of counting samples based on aerosol analytical filters of the AFA type;
- measure the total alpha and total beta activity of "thick-layer" counting samples prepared from the sample substance (for example, by evaporation or by any other method that provides a "thick" sample);
- measure the total alpha and total beta activity of "thin-layer" counting samples prepared from the sample substance (for example, by electrolytic deposition);
- measure activity, flux density, external alpha and beta radiation for sources of type 1P9, 2P9, 3P9, 1C0, 2C0, 3C0;
- control radiation contamination of surfaces by smears.
Device control and measurement data processing is performed by an external PC
The possibility to use custom calibrations
The possibility to select units of measurement
LED stabilization of the measuring path
Passive lead protection against background radiation
The possibility to maintain a measurement database
Methodological support of measurements
Atomtekh
Minsk
Produced in: Belarus, Minsk
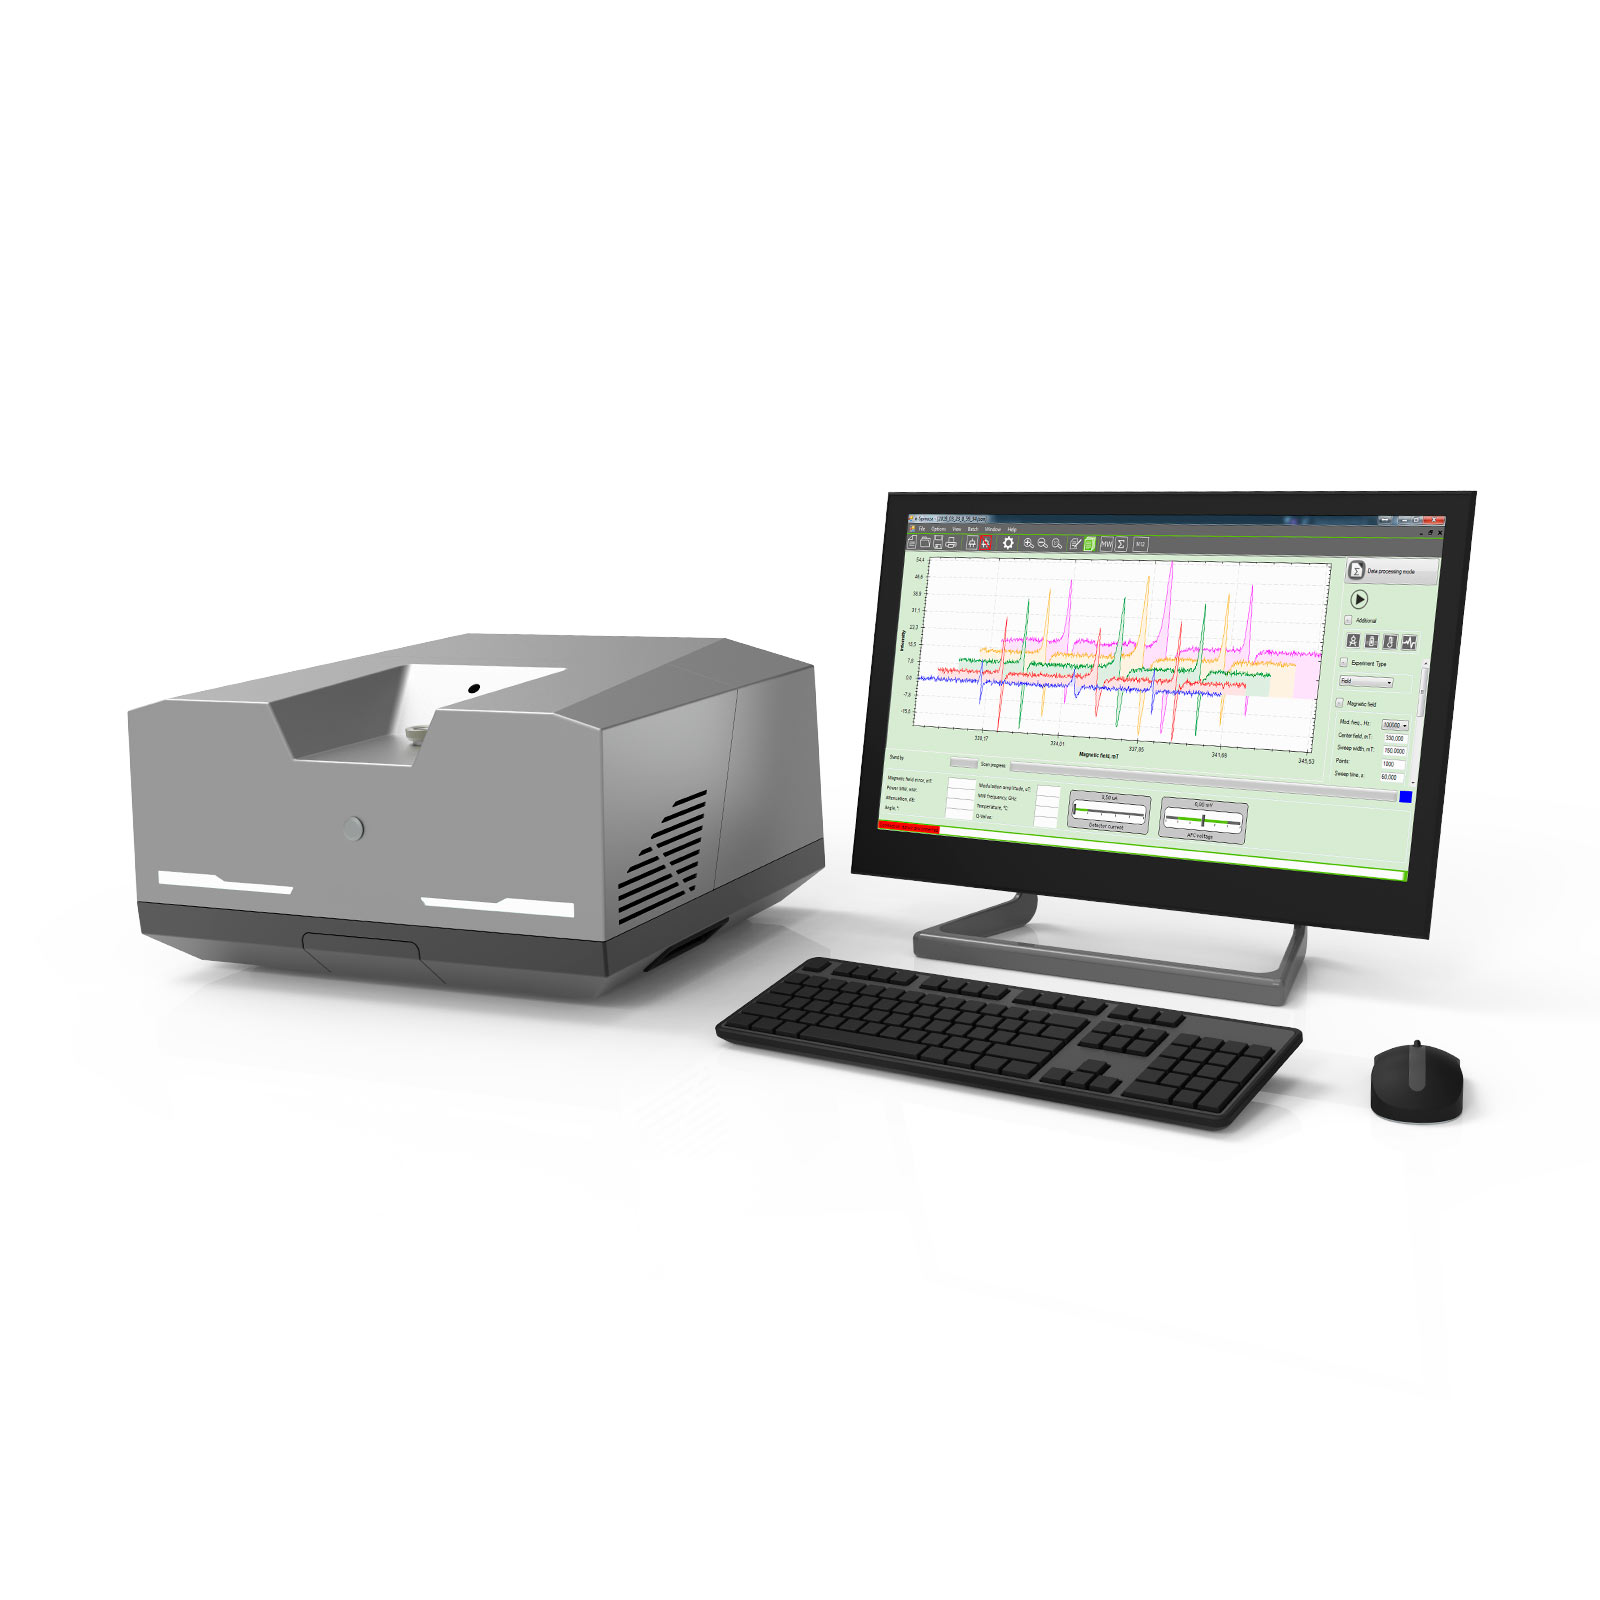
EPR spectrometer CMS8400 NEO
The CMS8400 NEO is a compact electron paramagnetic resonance spectrometer designed for routine research in physics, chemistry, biology and related scientific fields for direct detection of free radicals and paramagnetic materials. The CMS8400 NEO can be used in both laboratory and industrial settings in the mode of on-line measurements, embedded in technological processes, thus providing control of parameters and reactions in the production process.
Additional accessories and adapted software can make the spectrometer an analytical tool and allow to implement new complex applications in medicine, petrochemistry, brewing, sanitary and hygienic control, as well as in other industries.
ADVIN Smart Faktory
Minsk
Produced in: Belarus
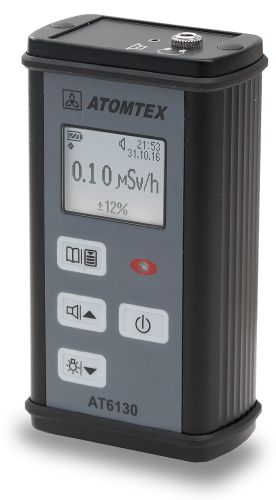
DOSIMETERS‑RADIOMETERS ISS‑AT6130, ISS‑AT6130A, ISS‑AT6130D
Small-sized devices for measuring the power of the ambient dose equivalent and the ambient dose equivalent of X-ray and gamma radiation, as well as measuring the flux density of beta particles (AT6130).
Durable metal case
Convenient menu
Selective measurement of beta and gamma radiation in mixed fields (AT6130)
Measurement of dose rate up to 100 mSv/h (AT6130D)
Search mode
Headphones for working in noisy environments (on request)
Atomtekh
Minsk
Produced in: Belarus, Minsk
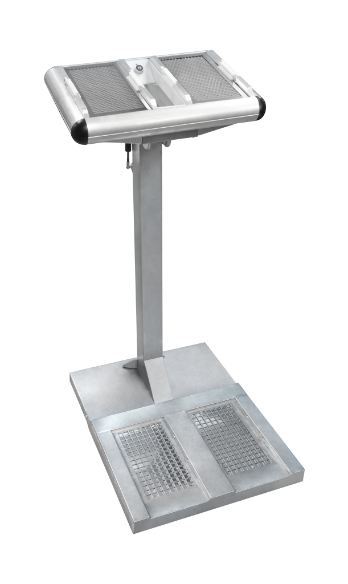
Installation of control of surface radioactive contamination of personnel RZA-08D
Installation for monitoring radioactive contamination of hands, feet (shoes) and clothing of personnel with alpha- and beta - active substances. Modern and intuitive interface, various versions.
Purpose:
monitoring the level of contamination of hands, feet (shoes) and clothing of personnel with alpha- and beta-active substances and signaling when exceeding permissible levels;
measurement of alpha and beta radiation flux density from the surface of the hands, feet (shoes) and clothing of personnel;
measurement of the surface activity of alpha- and beta-emitting radionuclides of hands, feet (shoes) and clothing of personnel.
Doza
Zelenograd
Produced in: Moscow
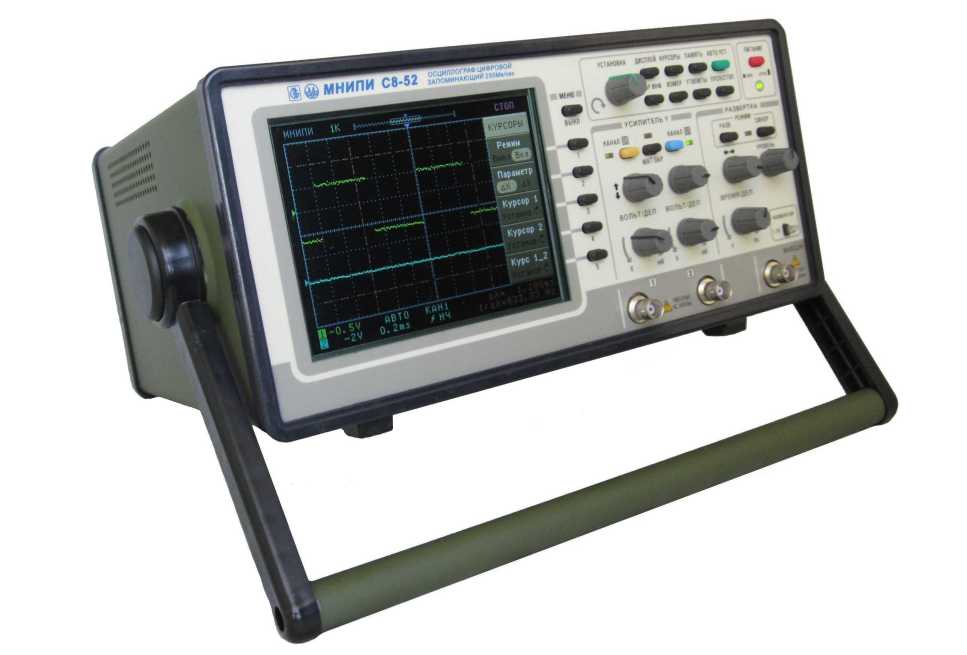
Digital oscilloscope S8-52
Designed to study and measure the parameters of electrical signals in the frequency band from 0 to 120 MHz.
Technical specifications:
Number of channels 2
120 MHz bandwidth
Sampling rate 250 MHz
Equivalent sampling rate of 10 GHz
Rise time of PH <= 2.9 ns
Input active resistance (1±0.02) Mom
Input capacitance <= 25 pF
120 MHz bandwidth
2 channels, external synchronization input
Vertical sensitivity 2 mV/div
Sampling rate up to 250 Mbps, in real time
Recording length up to 16K counts in each channel
Color LCD screen with LED backlight
Cursor and automatic measurements
USB and RS-232 interface
MNIPI
Minsk
Produced in: Belarus, Minsk
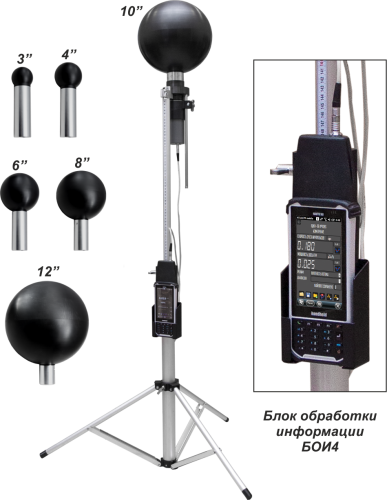
DOSIMETER‑RADIOMETER MKS‑AT1117M WITH DETECTION UNIT BDKN‑06 AND A SET OF RETARDER SPHERES
The result of determining the energy distribution of the neutron radiation flux density is used to calculate such quantities as:
- integral neutron flux density;
- the average energy of neutron radiation in the spectrum;
- the average neutron radiation energy by dose;
- dose equivalent per unit flow density;
- dose equivalent;
- effective dose.
▪ Methodological support of measurements
▪ It is possible to supply an expanded set of polyethylene retarder spheres with diameters: 3,5”; 4,5”; 5”; 7”; 9”; 9,5”
Atomtekh
Minsk
Produced in: Belarus, Minsk
Measuring recorder IS-203.2.0
from
28 152 ₽
The meter-recorder IS-203.2 is a microprocessor-based meter designed to measure temperature. Equipped with a non-volatile storage device and a real-time clock. The device has two measuring channels. The measurement results are stored in the non-volatile memory with a volume of 15,000 measurements per channel.
The operating conditions of the meter IS-203.2.0
Ambient temperature, ° C: -20...+50.
Relative humidity, %: up to 90.
Atmospheric pressure, kPa: 70...106.7.
Scope of application of the meter IS-203.2.0
Control of technological processes in various industries, including: utilities, construction, food and pharmaceutical industries, agriculture, etc.
Warehouses (grocery, industrial, pharmaceutical, etc.).
Transportation (grocery, industrial, pharmaceutical, etc.).
Functionality of the meter IS-
203.2.0 Temperature measurement by external sensors.
Saving the measurement results in the device memory.
Indication of the results of current measurements, time, channels included, interval between measurements, free memory of the device, battery capacity, serial number of the device, time of the next measurement.
Operational start and stop of the measurement process.
Data transfer to a PC via a COM port or USB.
TEKHNO-AS
Kolomna
Produced in: Kolomna, Moscow region
Smart Atmospheric Pressure Probe with built-in flash memory
from
10 074 ₽
Designed to measure the temperature of gaseous materials without mechanical impurities and aggressive vapors, atmospheric pressure.
The smart atmospheric pressure probe with built-in flash memory is designed to measure the temperature of gaseous materials without mechanical impurities and aggressive vapors, atmospheric pressure by direct contact of the probe with the measuring object and transmitting the measured value via Bluetooth to devices with the installed ThermoMonitor based on the Android program.
Operating conditions of the SZDAP smart probe
Ambient temperature, °C: -20...+55.
Relative humidity, %: not more than 80 at T=35 °C.
Atmospheric pressure, kPa: 86...106.
Functionality of the smart probe SZDAP
Measurement of physical quantities with a resolution of 0.01.
Recording of measured values at intervals from 5 seconds to 23 hours 59 minutes 59 seconds (only smart probes with built-in memory).
Transmitting data about measured physical quantities via Bluetooth to a device with the ThermoMonitor. The Android program is installed.
Transmitting information about the state of charge of the built-in battery via Bluetooth to a device with the ThermoMonitor. The Android program isinstalled.
Automatic transition to sleep mode after 50 seconds.
The ability to connect an external power supply.
Possibility of calibration.
TEKHNO-AS
Kolomna
Produced in: Kolomna, Moscow region
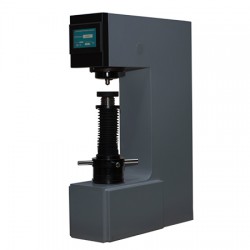
Metolab 601-01 Brinell Hardness Tester
METOLAB 601-01 is a stationary hardness tester, a modification of the METOLAB 601 device with an expanded configuration and improved technical characteristics. The METOLAB 601-01 hardness tester is designed for high-precision measurements of the specified parameters of various parts and materials (hardened and non-hardened steels, cast iron, non-ferrous metals, soft alloys, etc.). The METOLAB 601-01 device has high accuracy, allows measurements in a wide range and provides high repeatability of results.
The main difference from the younger model is the presence in the basic configuration of a digital camera and a disk with software for processing received data on a personal computer. Also, the METOLAB 601-01 device allows you to automatically calculate the hardness value.
Due to its characteristics, the stationary Brinell hardness tester METOLAB 601-01 can be used in a wide variety of industries and production, as well as in educational institutions of various levels in the training of specialists.
The stationary Brinell METOLAB 601-01 hardness tester is included in the State Register of Measuring Instruments of Russia and comes with a certificate of primary verification (on request). The number in the GRSI is 65684-16.
Distinctive features of the stationary METOLAB 601-01 Brinell hardness tester:
Software on disk;
Digital camera for recording actions by the operator;
Automatic or manual capture and fingerprint tracking;
Automatic calculation of hardness values;
Simple and intuitive interface of the device;
Wide range of measured values on the Brinell scale (from 8 to 650 HBW);
The presence of an electronic switch of the applied load;
Large and bright LCD display;
Displaying all necessary service information on the device screen, including exposure time and real load readings;
Russian version of the device menu;
High accuracy and repeatability of measurement results.
Basic package of delivery:
Stationary METOLAB 601-01 Brinell hardness tester;
Microscope, 20x;
Digital camera;
Software on CD-ROM;
USB key;
Indenter with carbide ball (Ø10,0mm; Ø5,0mm; Ø2,5mm) - 1 pc.;
Large flat table;
Small flat table;
V-shaped table;
Brinell hardness measures - 1 set;
User Manual.
Metolab
Moscow
Produced in: Moscow
