Catalog
Search
728 products
View:
- Selected: 1Applying
- Selected: 0Names
- Selected: 0Manufacturer
- Selected: 0Made in
- Selected: 0Additional
View:
728 products

Accessories for oscilloscopes C8
from
735 855 ₽
VNIIFTRI
Mendeleevo
Produced in: Mendeleevo, Moscow region

Mobile Laboratory For The Control Of Physical Factors
The companies NTM-Zashchita LLC (Moscow) and Avtospectr-NN (Nizhny Novgorod) have implemented a joint project "Mobile Laboratory for Physical Factors Control", which is a mobile complex equipped with the most modern equipment of well-known Russian and foreign manufacturers, designed to effectively solve the problems of sanitary and hygienic control and labor protection, certification of workplaces and monitoring of the production environment.
NMT-ZASHCHITA
Moscow
Produced in: Moscow
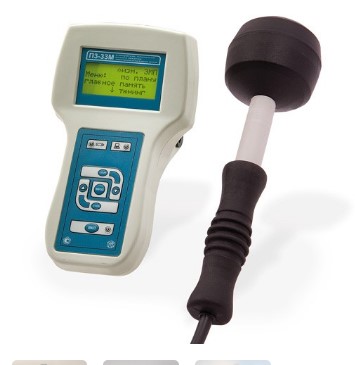
P3-33M Electromagnetic Field Energy Flux Density Meter
from
117 000 ₽
Meets the requirements of the US and German standards.
The energy flux density meter (PPE) of the electromagnetic field PZ-ZZM is designed to measure the PPE in continuous generation mode in the frequency range from 0.3 to 18 GHz when monitoring the levels of the electromagnetic field for compliance with the requirements of electromagnetic safety standards.
The meter is used to measure the levels of microwave radiation in residential and working premises in the presence of electrical equipment for power, household, switching and information purposes, as well as during a comprehensive sanitary and hygienic survey of territories. The meter is allowed to be used for work in the field.
The meter consists of an antenna-converter of the electromagnetic field energy flux density into a constant voltage and a measuring and display unit that performs analog-to-digital conversion, digital signal processing and output of measurement results to a liquid crystal display screen, as well as to a personal computer. The antenna of the meter has three dipole-detector microassemblies that form a mutually orthogonal structure. The resulting PPE value is defined as the vector sum of the PPE measured by each dipole microassembly
NMT-ZASHCHITA
Moscow
Produced in: Moscow
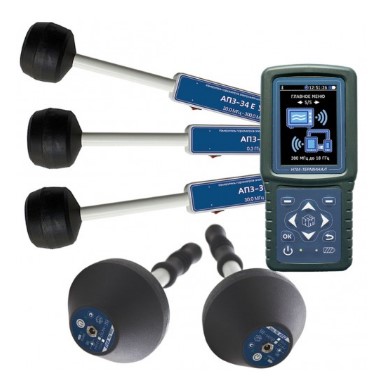
COMBO FACTOR (VE-meter 50Hz, VE-meter AT-004, E-meter AT-005, P3-34)
from
375 000 ₽
Frequency ranges: from 48 to 52 Hz, from 5 Hz to 400 kHz, from 10 kHz to 30 MHz, from 30 to 300 MHz, from 30 to 50 MHz, from 300 MHz to 18 GHz.
three - coordinate antennas;
large amount of built-in memory for recording measurement results;
high measurement accuracy;
the meter is provided with a two-year warranty and manufacturer's service support for the entire service life;
wireless Bluetooth communication channel;
Control unit and display of measurement results NTM-Terminal.
single control unit;
the ability to connect multiple meters to one control unit;
ergonomic body and comfortable keyboard;
high-resolution color display that provides a comfortable presentation of the results;
ability to record measurement results;
reference base of normative documentation.
The meter is adapted to work in the control and analytical complex "NTM-EcoM".
the possibility of monitoring the electromagnetic situation at the facilities;
storage of measurement results in the NTM-EcoM program archive;
analysis of the results obtained for compliance with current regulations;
execution of the protocol of instrumental measurements
NMT-ZASHCHITA
Moscow
Produced in: Moscow
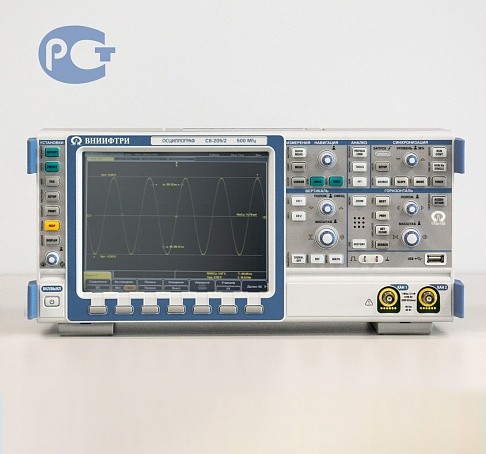
Digital storage oscilloscope S8-205/2
from
954 216 ₽
VNIIFTRI
Mendeleevo
Produced in: Mendeleevo, Moscow region
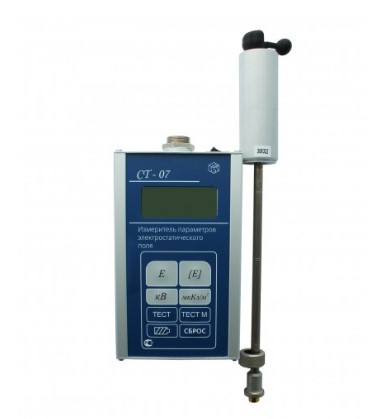
ST-07 Electrostatic Field Parameter Meter
from
97 200 ₽
It is intended for express measurements in residential and working premises of biologically hazardous levels of electrostatic fields, the sources of which are electrical installations, information display media (computer displays, televisions, slot machines), as well as finishing building materials.
NMT-ZASHCHITA
Moscow
Produced in: Moscow
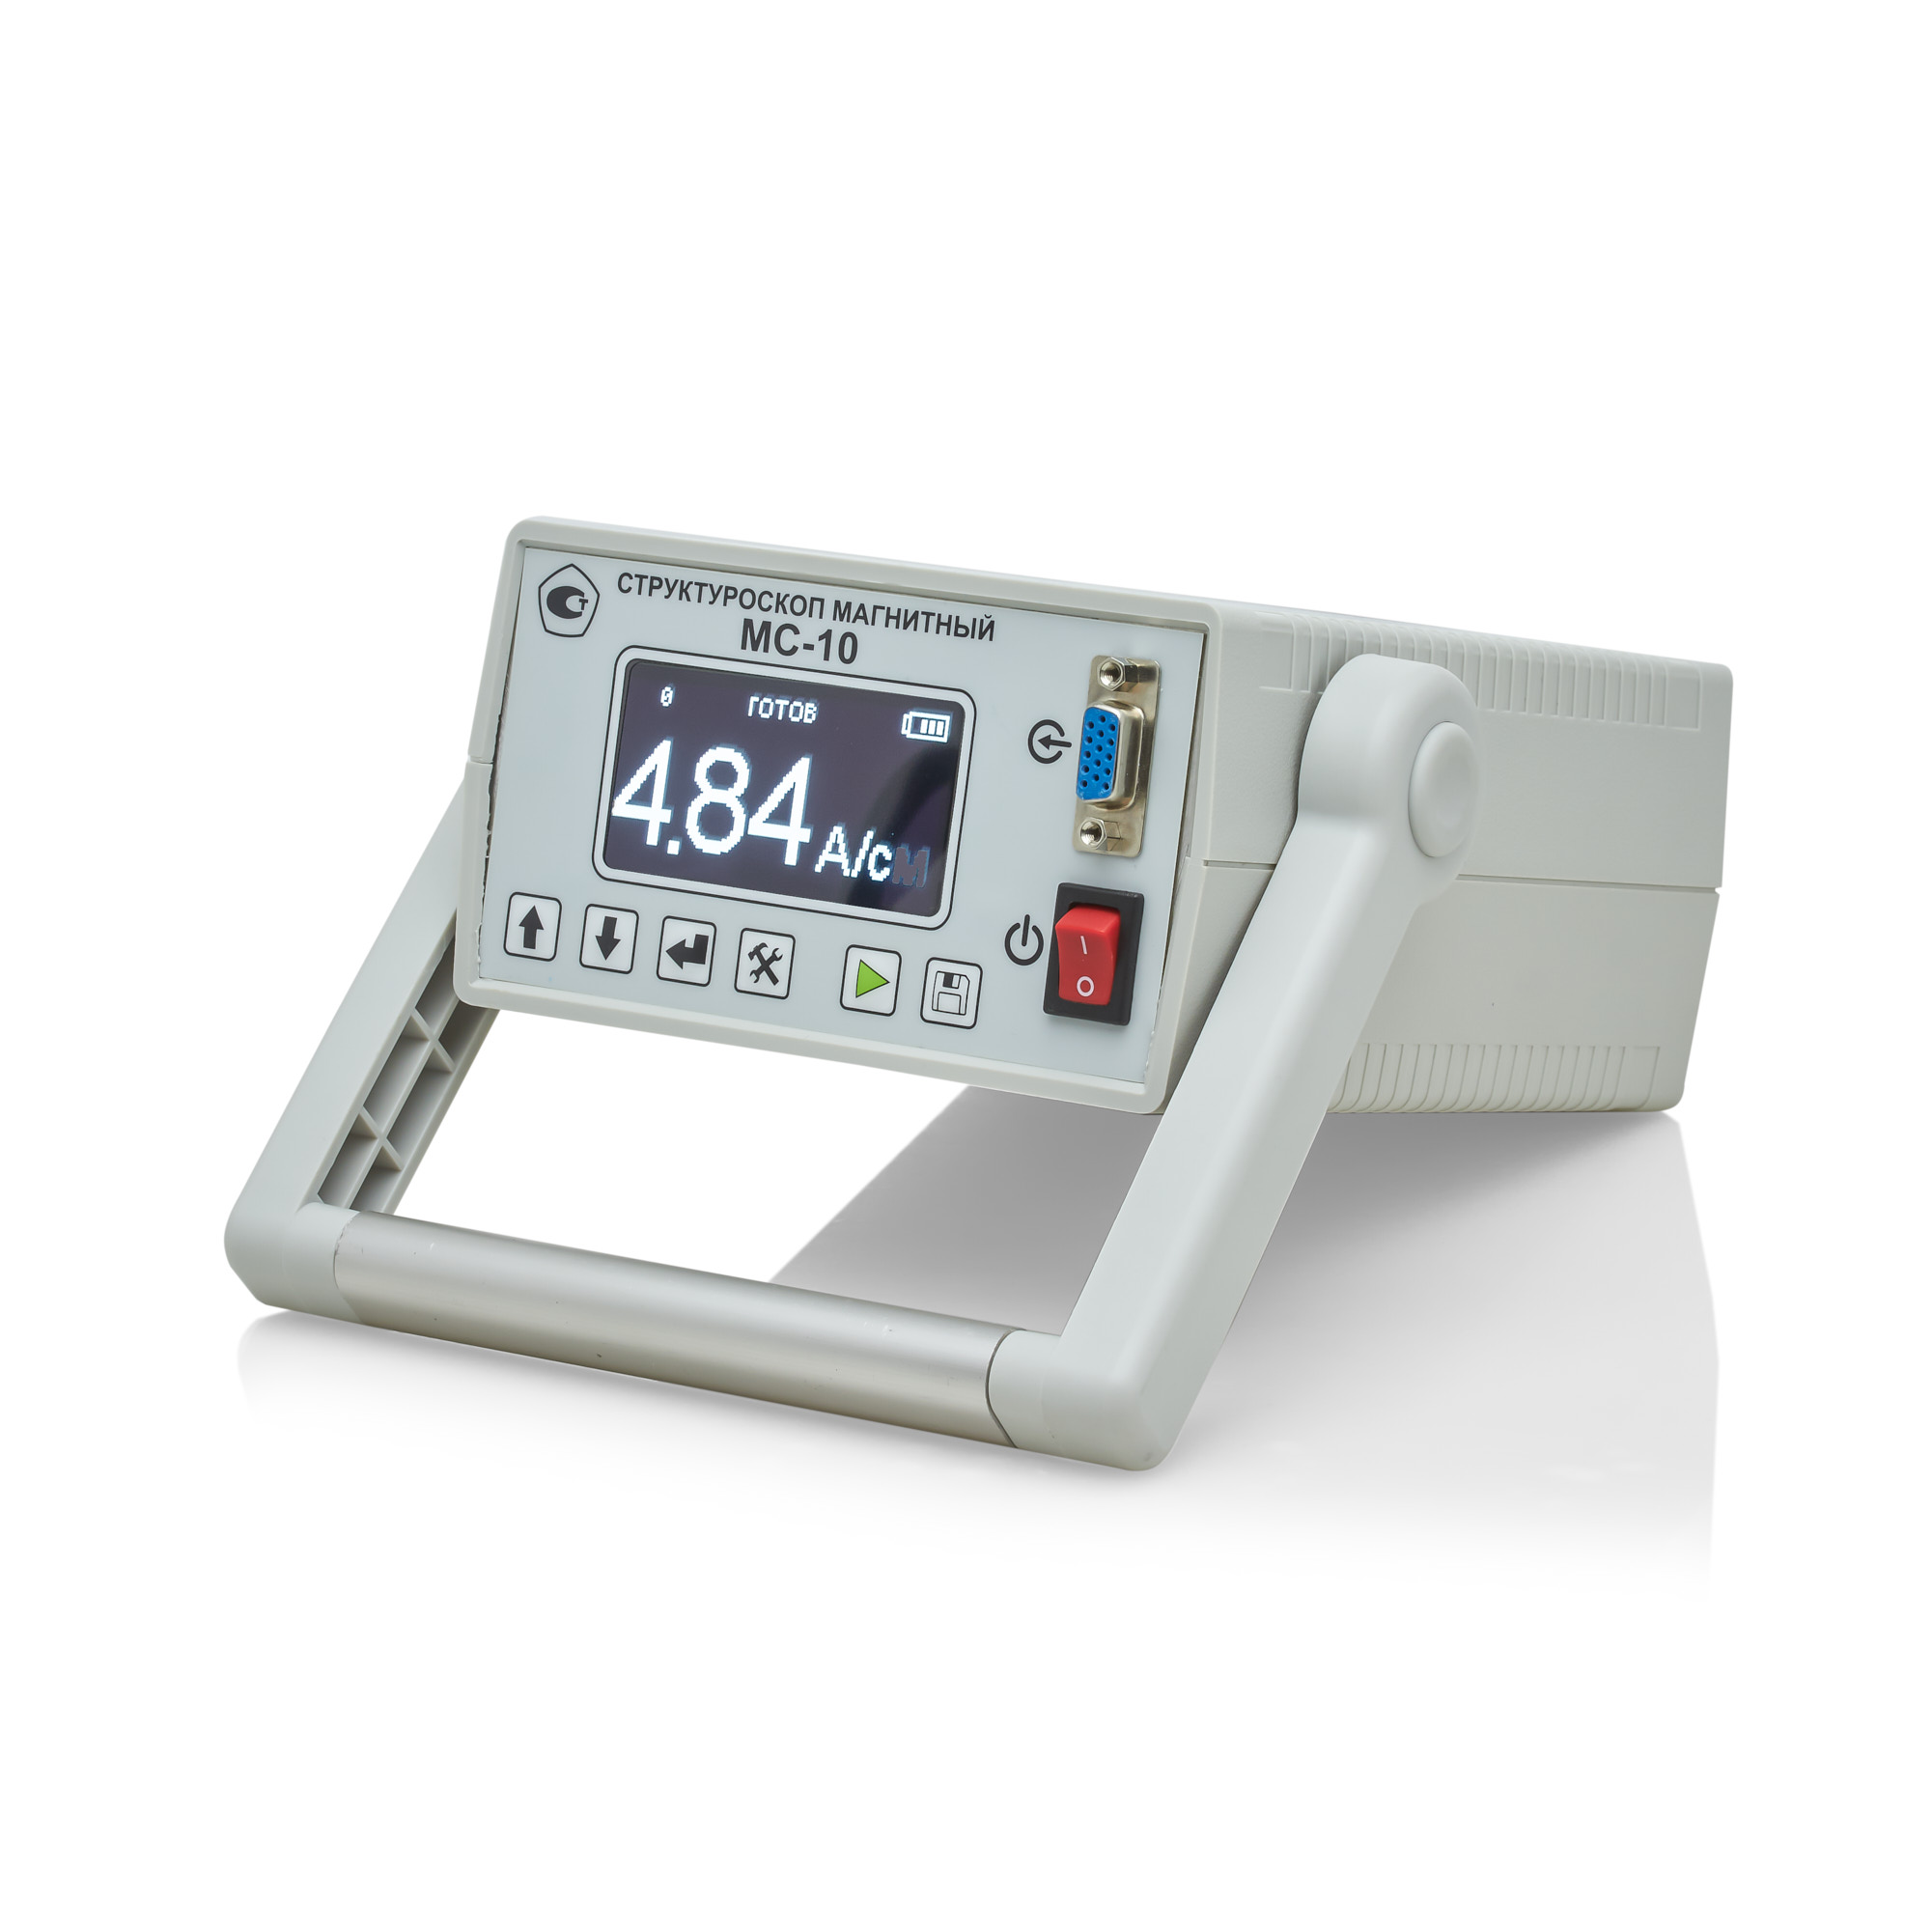
MS-10 Magnetic Structuroscope
from
270 000 ₽
Distinctive features:
- Non-destructive testing of strength, plasticity and viscosity of parts and structures made of ferromagnetic steels and cast iron according to the following standards: GOST 30415-96, OST 14-1-184-65, TU-14-1016-74
- Non-destructive testing of the depth and hardness of surface-hardened layers on steel and cast iron parts;
- Quality control of low-temperature tempering of cutting and measuring tools, bearing steels;
- Control of uniaxial elastic stresses;
- Control of the uniformity of the properties of massive parts.
Technical specifications:
The range of coercive force of the material of the controlled products, A/cm, is 1.0...60.
The limit of the permissible basic absolute error of measurements of the coercive force (Ns) on standard samples at a normal ambient temperature of 20 ± 5°C does not exceed the values of 0.1+0.04 Ns
(Ns stands for the measured value of the coercive force of the standard sample).
This error probability is provided with a gap between the converter and the surface of the controlled product not exceeding 0.5 mm.
Basic version: The structroscope is powered by a battery.
Extended version: It is possible to work on 220V/50Hz grid.
The time of setting the operating mode after power on, min: no more than 2
Time of one measurement, sec: no more than 6
Continuous operation time (without recharging), h: at least 16
Internal memory: up to 512 series of 512 measurements each with the possibility to view the results
Operating temperature range: -20°C to +40°C;
Overall dimensions, (length x width x thickness), mm:
electronic unit: 190x140x80
converter: 135x75x100
Weight, kg:
the electronic unit with a battery: 2.3 ± 0.05
the converter: 1.3± 0.05
Basic version kit:
Ia5.173.023 Electronic unit: 1 pc.
Ia5.125.061 Converter: 1 pc.
Ia8.896.121 Control sample of coercive force (plate PN-1): 1 pc.
Ia8.896.122 Control sample of coercive force (plate PN-2): 1 pc.
Bag-case: 1 pc.
Charger: 1 pc.
Ia2.778.042 RE Operating Manual: 1 copy.
Ia2.778.042 FO Form: 1 copy.
Ia2.778.042 MP Verification instructions: 1 copy.
Extended version:
Additionally, it can be equipped with a Bluetooth® module for communication with a PC and software for receiving and processing data.
It can also be equipped with a small-sized converter.
RII MNPO SPEKTR
Moscow
Produced in: Moscow
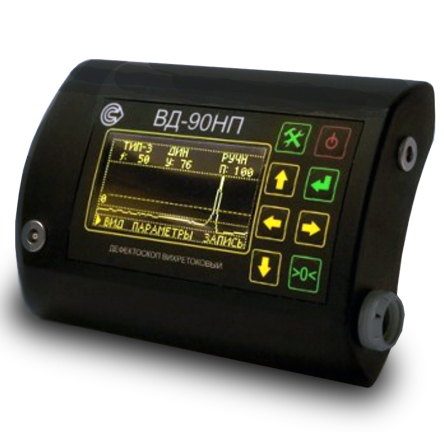
VD-90NP Eddy current flaw detector in the basic configuration
from
295 000 ₽
The principle of operation of the device:
The principle of operation of the flaw detector is based on the excitation of eddy currents in the controlled product and the subsequent release of a signal at the output of the converter, the amplitude and phase of which are determined by the secondary field of eddy currents.
Design features and advantages of the VD-90NP flaw detector.
The device has a small-sized case, which ensures its lightness, ergonomics and allows you to mount it on your belt or on your arm. The measurement is performed using a remote converter connected by a flexible cable. There are several types of converters for eddy current flaw detection of products made of different materials and different geometries. The large and bright display displays the selected operating modes and measurement results in text and graphic form. The VD-90NP is also characterized by:
high sensitivity (it detects cracks starting from 0.1 mm in size);
dust–and-moisture-proof housing, which makes it applicable for work in the field;
large operating frequency range;
maximum working clearance up to 10mm;
Bluetooth connection;
the ability to control products with high surface roughness, up to Rz320 class;
light and sound indication of defect detection;
wide operating temperature range from –30°C to +50°C;
autonomous low-voltage power supply;
long continuous operation time from one set of batteries;
compliance with the standard GOST R ISO 15549-2009 (ISO 15549:2008).
The use of a microprocessor-based hardware and software platform provide it with the following operational characteristics:
automatic adjustment when measuring conditions change, including compensating the influence of the gap;
built-in calibration modes;
saving the measurement results in the internal memory of the device;
a large number of stored programs: sets of parameters and measurement modes, both preset and saved by the user so as to repeatedly monitor the same type of products;
The Bluetooth 2.0 wireless communication module allows the device to be used in conjunction with an external laptop or mobile device for remote control, transmission of measurement results for further storage, printing, documentation and analysis.
Scope of application:
The eddy current method is suitable for non-destructive testing and detection of microcracks in products and parts made of any metals and alloys of complex shape, with high surface roughness, through non-conductive coatings, as well as for checking welded joints. The flaw detector can be used to control parts and assemblies of aviation equipment.
The VD-90NP eddy current flaw detector is used for quality control and preventive examination of:
- components and parts of rolling stock at railway transport enterprises: wheel sets, auto coupler housings, side frames, spring beams, labyrinth rings, pulleys;
- pipes, profiles, rods at rolling mills at the output control, and at the input control of consumers of products;
- products made of aluminum and titanium alloys with multilayer coatings at enterprises of the aviation and aerospace industry;
- cables, beams, critical components of equipment (cranes, lifts) in construction;
- main pipelines in order to detect stress corrosion.
A wide range of operating temperatures, dust and moisture protection (IP54 degree of protection), autonomous low-voltage power supply, a long time of continuous operation of the device allows it to be used in the field at low temperatures and under precipitation (rain, snow).
Basic kit:
• 1 electronic unit for the VD-90NP eddy current flaw detector;
• 1 Ia5.125.052 (Type-2) eddy current converter;
• 1 converter cable;
• 1 charger with batteries;
• 1 hand strap;
• 1 Ia8.896.104 sample with artificial defects;
• 1 Ia8.896.035 coating sample;
• 1 storage and carrying case;
• 1 documentation set.
RII MNPO SPEKTR
Moscow
Produced in: Moscow
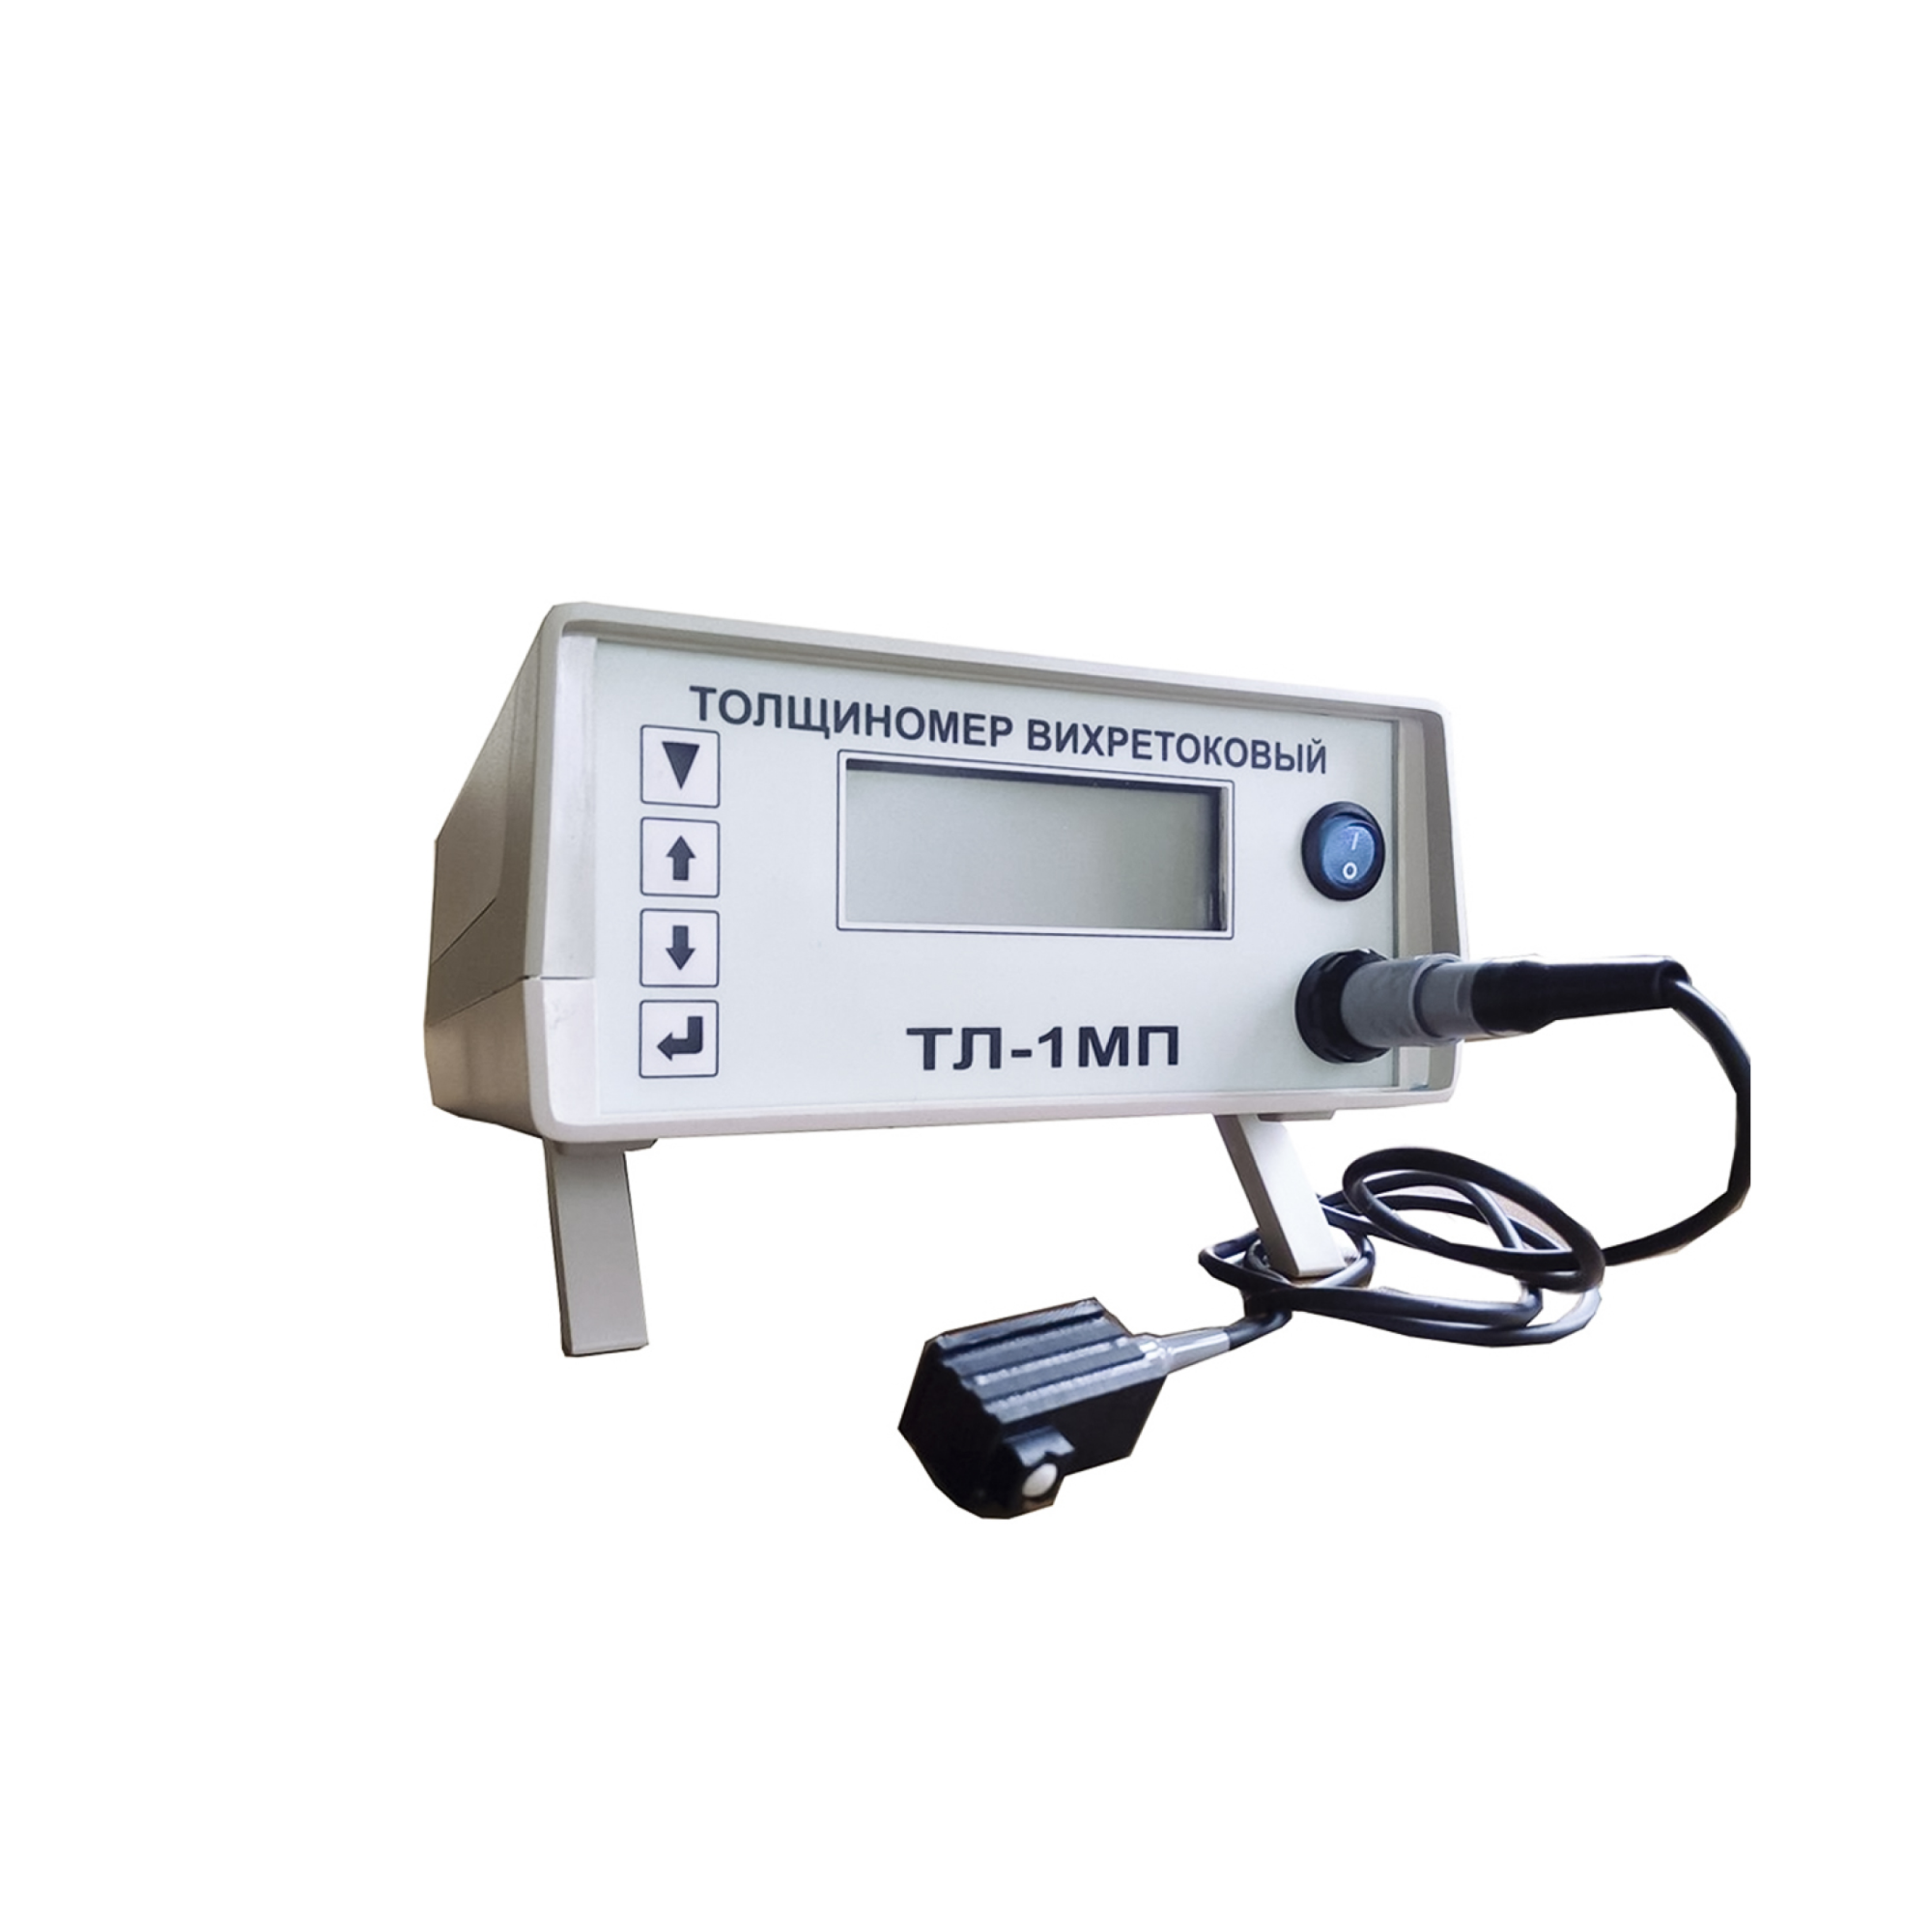
TL-1MP Eddy Current Thickness Gauge
from
965 000 ₽
The principle of operation of the electroplating thickness gauge:
A converter with an induction coil on a ferrite core generates a high-frequency signal (frequency 1 MHz), which is used to create an alternating magnetic field. As the converter approaches the conductive surface, an alternating magnetic field creates eddy currents, the magnitude of which depends on the characteristics of the metal base and the thickness of the coating. In turn, eddy currents create their own electromagnetic field, which can be received by an induction coil. The resulting signal enters the amplitude detector, after which it is transmitted to the processing unit, where it is digitized and displayed on the device readout. In addition to signal conversion, the processor is used to set the required gain, as well as the initial voltage offset, depending on the characteristics of the materials in the controlled object.
Features of the device design and advantages of the measurement method
The TL-1MP eddy current thickness gauge consists of an electronic unit with a display, a power supply and a converter. The device is controlled using four buttons located on the front panel of the electronic unit. The converter can be disconnected from the electronic unit during transportation or for convenience of storage. The advantages of the device include:
- convenience and ease of operation;
- small size and light weight, allowing the TL-1MP to be used in difficult conditions with limited access to the controlled area of the facility;
- high measurement accuracy;
- factory setting of the measuring instrument to the customer's requirements;
- high degree of localization of defects due to the small size of the converter.
Scope of application:
The service life of metal parts and components of mechanisms used in mechanical engineering is largely determined by their resistance to corrosion and surface wear. However, not all metals are sufficiently resistant to external destructive influences. Therefore, various electroplating coatings made of zinc, nickel, chromium, cadmium, tin, copper, silver and other metals are used to protect them. Even small fluctuations in the thickness of protective coatings can significantly affect the performance characteristics of parts, their service life, and interaction with other components. Therefore, measuring the thickness of the metal coating applied by the electrochemical method is important when conducting quality control of products. The use of the TL-1MP eddy current thickness gauge allows non-destructive quality control of electroplating coatings on the surface of metal parts in mass production conditions with special requirements for product quality. The device detects even small mechanical defects, the effects of abrasion, erosion, corrosion on the surface. Due to its ease of use, efficiency and reliability, eddy current thickness measurement is a standard method of quality control of products with electroplated coatings in such industries as mechanical engineering, aerospace industry.
RII MNPO SPEKTR
Moscow
Produced in: Moscow
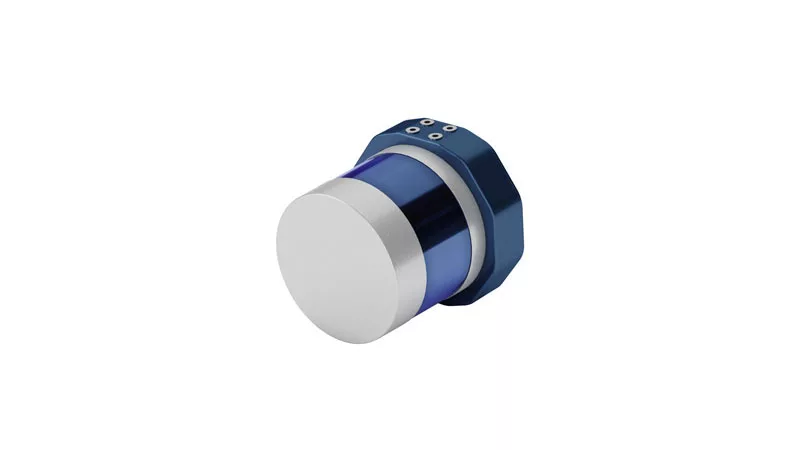
AGM-MS3 mobile scanning system
Multifunctional hardware and software complex for mobile and airborne laser scanning from unmanned aerial vehicles (UAVs).
Main areas of use:
› engineering surveys;
› creation of three-dimensional models of infrastructure facilities;
› certification and diagnostics of the state of roads and railways;
› creating GIS for various purposes;
› and other.
The UAV laser scanner weighs 1.5 kg, which makes it easy to install on a wide range of UAVs. The AGM-MS3 laser scanner is designed for fully autonomous operation with minimal operator involvement, making shooting easy, fast and convenient. The possibility of integrating an external camera, from panoramic to thermal imaging, opens up a limitless number of applications.
AGM SISTEMY
Krasnodar
Produced in: Krasnodar
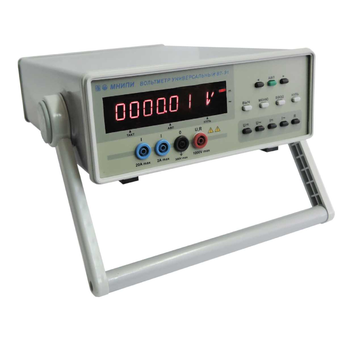
Voltmeters B7-91, B7-91/1
Technical specifications:
DC voltage ,
Measuring range, 10 MV - 1000 V
Measurement error, ± 0.03%
AC voltage ,
Measuring range, 1 mV - 750 V
Measurement error, ± 0.4%
Frequency range, 20 Hz- 100 kHz
Direct current ,
Measuring range, 1 mkA - 2 A (B7-91/1)
Measuring range, 1 mkA - 20 A (B7-91)
Measurement error, ± 0.03%
MNIPI
Minsk
Produced in: Belarus, Minsk
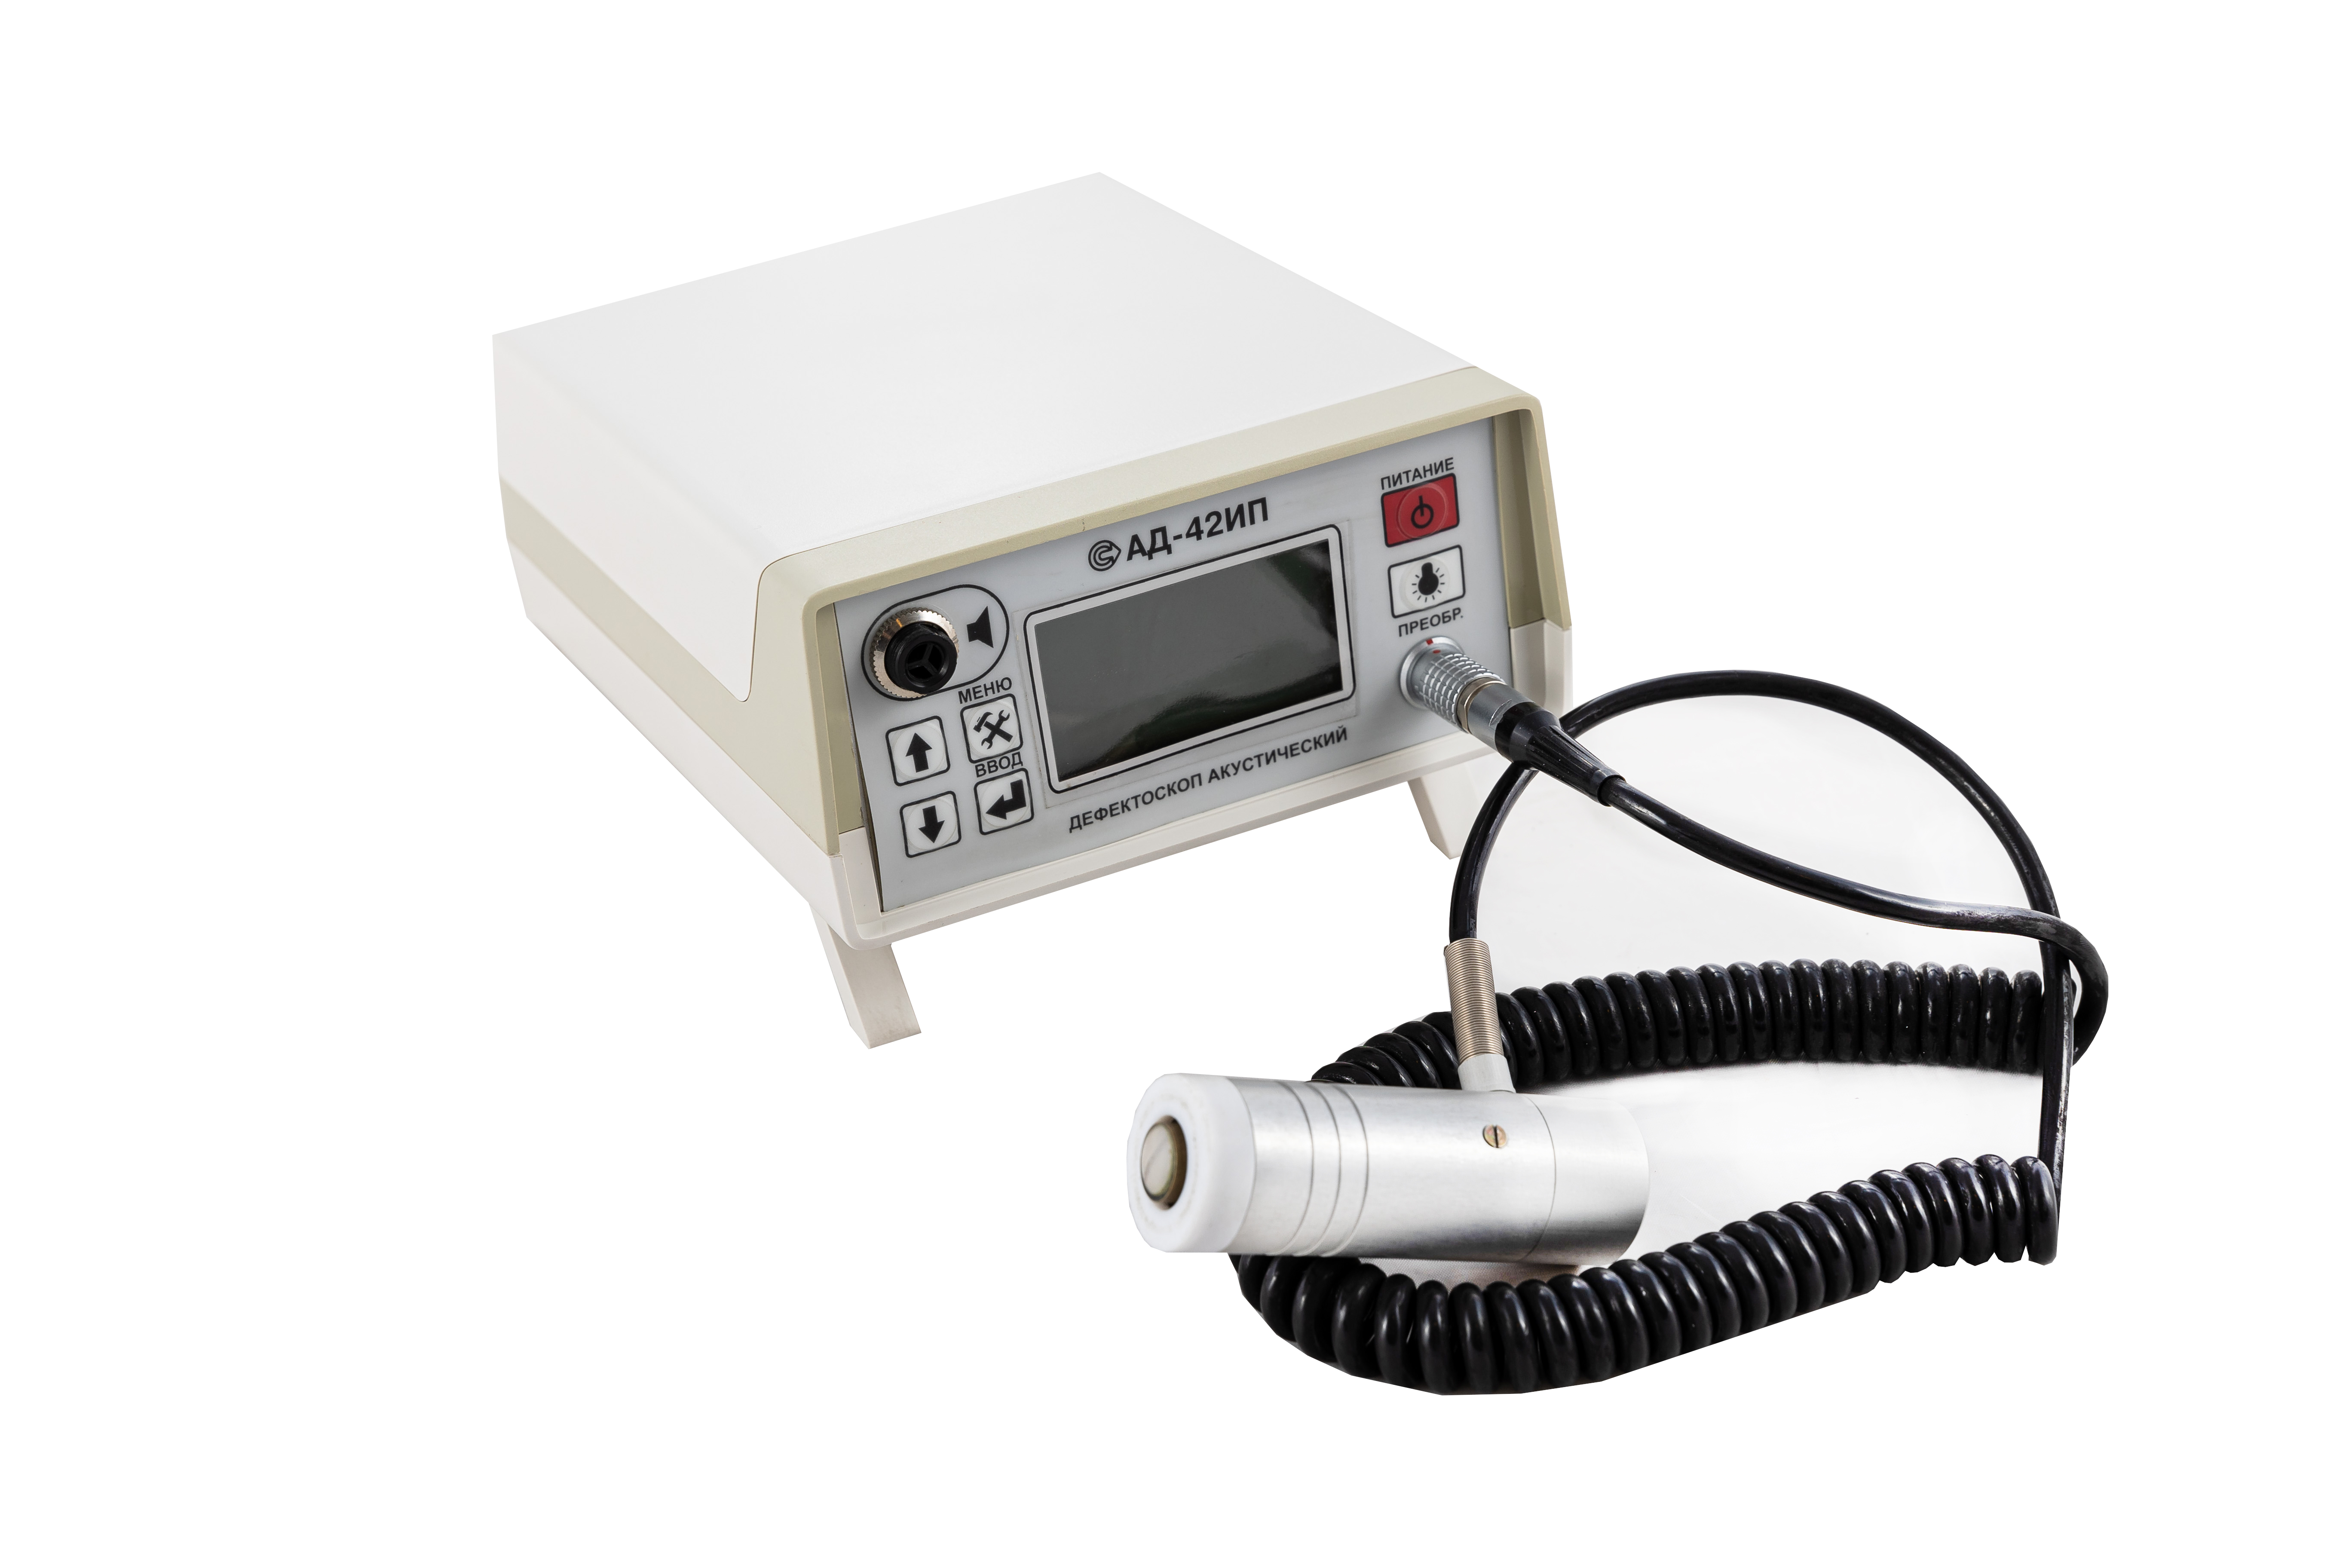
AD-42IP Acoustic Flaw Detector
from
383 500 ₽
It is especially effective for use in products made of composite materials (including with honeycomb filler).
Distinctive features:
The AD-42 IP is a compact acoustic system sensitive to changes in mechanical impedance caused by product defects. The indication of the device indicates that there are voids, non-adhesives, delaminations or changes in the structure of composite materials (including with honeycomb filler and laminated plastics) under the sensor.
The device is used to monitor various materials and their combinations.
The energy consumption of the unit is low because the converter is switched on when the sensor is placed on the monitored product.
Being light enough, the device allows you to perform monitoring in hard-to-reach places or in confined spaces.
The results of the control can be stored in the built-in non-volatile memory and transferred to a PC.
Converters
Options: - 3 types of converters for various tasks
Emitters: - 1 or 2 on each converter
Switching-on: - The converters are switched on when they are placed on a controlled object.
Technical characteristics:
Weight, kg: 0.73
Dimensions, mm: 210x150x70
Power supply: 4 AA batteries
Work without recharging the battery, h: 8
Battery discharge visual indication
The defect alarm is visual on the converter and audible on the instrument panel (or) in headphones.
RII MNPO SPEKTR
Moscow
Produced in: Moscow