Equipment

2284 products
View:
  • Selected: 0
    Applying
    Loading...
  • Selected: 0
    Names
    Loading...
  • Selected: 0
    Manufacturer
    Loading...
  • Selected: 0
    Made in
    Loading...
  • Selected: 0
    Additional
    Loading...
All filters
  • 24
    Applying
    Loading...
  • 394
    Names
    Loading...
  • 122
    Manufacturer
    Loading...
  • 56
    Made in
    Loading...
  • 91
    Additional
    Loading...
View:
2284 products
Two-channel portable gas chromatograph FGH-1-2
from 1 030 000 ₽
The FGH-1-2 chromatographs have retained the main advantages of the FGH-1 model – mobility and ease of operation and maintenance. At the same time, FGH-1-2 has all the advantages of a modern multichannel chromatograph – the ability to reliably identify and accurately determine the concentrations of various pollutants of environmental objects. The additional use of automatic identification in the processing of chromatograms simultaneously through both channels makes FGH-1-2, in fact, a universal selective gas analyzer of organic substances using the chromatographic separation method. In FGH-1-2, as well as in FGH-1, all methodological problems have been solved: all measurement methods (MI) used are certified, the devices are equipped with sampling devices prescribed in MI, the devices are graded according to the required substances, independent control of the stability of calibration characteristics and measurement errors is provided.
EKAN
Moscow
Produced in: Moscow
Two-jet arc plasmatron "Torch"
The plasmatron is designed for direct atomic emission spectral analysis of powder samples. The excitation of atoms occurs in a DC argon arc plasma. Weak matrix effects and low detection limits make it possible to use this excitation source for the analysis of various samples, both with mineral and organic matrix.
Produced in: Novosibirsk
Anemometer AP1M with cup sensor AP1M2
from 47 332 ₽
Range: 0.8-20.0 m/s; Accuracy characteristics: PG±(0.3+0.05V) m/s; The power is supplied from a 4.8 V battery. The power consumption is 0.1 VA. Application conditions: For primary measuring transducers: from minus 30C to plus 50C in the range of 1.0–20.0 m/s; For digital measuring console: from minus 10C to plus 50C; Relative humidity 45-80% at temperature (25±10)With; Continuous operation time at negative temperatures up to minus 30C is no more than 1 hour.
EMPGGO
Saint Petersburg
Produced in: Saint Petersburg
POWDIX 600 X-ray powder diffractometer
A feature of the POWDIX 600 X-ray diffractometer scheme is the vertical Bragg-Brentano optical scheme with a fixed horizontal sample position, which makes working with powdery materials, gels and other viscous substances more practical and convenient. The high detector resolution and precise positioning of the POWDIX 600 X-ray goniometer achieve an accuracy better than +/- 0.02° (2θ) over the entire angular range. In the POWDIX 600 diffractometer, the X-ray tube is cooled by an integrated closed water circuit, which can be serviced by any laboratory employee. A wide variety of sample holders (holder for massive samples, holder with rotation, phoneless cuvettes) expands the functionality of the POWDIX 600 and makes it an invaluable tool for scientific research in solid-state physics, materials science, chemistry, geology and other fields of science The diffractometer is included in the Russian State Register of Measuring Instruments.
Produced in: Belarus, Minsk
DOSIMETER‑RADIOMETER MKS‑AT1117M WITH DETECTION UNIT BDKN‑06 AND A SET OF RETARDER SPHERES
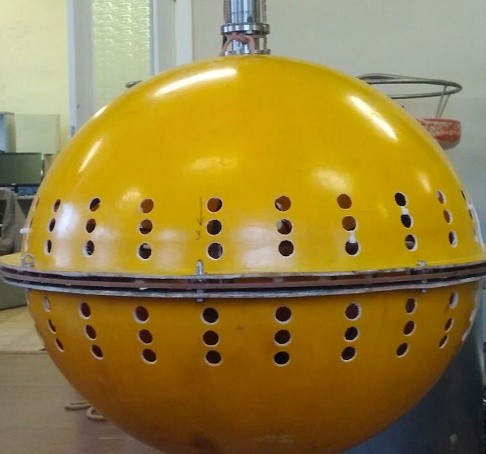
The result of determining the energy distribution of the neutron radiation flux density is used to calculate such quantities as: - integral neutron flux density; - the average energy of neutron radiation in the spectrum; - the average neutron radiation energy by dose; - dose equivalent per unit flow density; - dose equivalent; - effective dose. ▪ Methodological support of measurements ▪ It is possible to supply an expanded set of polyethylene retarder spheres with diameters: 3,5”; 4,5”; 5”; 7”; 9”; 9,5”
Produced in: Belarus, Minsk
Rubidium frequency standard H1-1014
The built-in time scale shaper provides a pulse signal of 1 c at the output of the device. Its small dimensions, weight, power consumption, and operating time allow it to be widely used as an embedded source of high-stability signals in frequency measuring devices and complexes, telecommunications systems, navigation and communication systems. It includes a frequency binding module based on a pulse signal of 1 s from an external time scale or from a SRNS GLONASS/GPS receiver and a tunable frequency synthesizer with the ability to adjust the frequency via the RS-232 interface. The built-in binding module allows the device to be used when operating in automatic correction mode as a source of a highly stable signal with a frequency error of ± 5 · 10-12 per day.
Ruknar
Nizhny Novgorod
Produced in: Nizhny Novgorod
Pressure gauge MTIf-100
Pressure gauge with a range of measured pressure 0 ... 100 kPa. Accuracy class 0.4 Connection size M20x1.5 mm Overall dimensions 160 mm
Produced in: Tomsk
MX-10 Magnetometer
MX-10 Magnetometer
from 67 000 ₽
The MX-10 magnetometer is an auxiliary tool for conducting magnetic powder control using permanent magnets, rectified current electromagnets by the applied field method, as well as for monitoring by the residual magnetization method according to the requirements of the current regulatory documentation. The MX-10 magnetometer meets the requirements in the field of non-destructive testing for the main industries: nuclear, energy, oil and gas complex, general and special engineering, railway transport, aerospace industry, elevator and crane facilities, etc. Magnetometer MX-10 is an electronic measuring unit with a remote measuring converter, which is based on the Hall effect. The design of the device allows measuring both the normal and tangential component of the magnetic induction vector directly on the surface of the part. The measured value of the magnetic field induction value is displayed on the digital indicator of the electronic unit. Features and Benefits The updated version of the MX-10 magnetometer has a modern element base, which has significantly improved its performance, reduced error and expanded the measurement range (see the Table of Technical characteristics). The device is capable of operating in two modes: Constant measurement mode. This is convenient when carrying out a large number of measurements over a short period of time. Automatic shutdown mode 1 minute after measurement. It allows you to save the charge of the device, which is especially important in the field. A thermal compensation circuit ensures stable measurement readings at any temperature change. Other features include: The small dimensions of the Hall measuring transducer for the MX-10 magnetometer make it possible to measure the induction of the magnetic field in grooves, grooves, angular transitions, i.e. in those areas of the controlled product that are stress concentrators and are most dangerous from the point of view of cracking; A wide range of measurements of the magnitude of the magnetic field induction; The smallest measurement error among analogues in the entire operating temperature range; Convenience of measurement by a remote measuring transducer in various planes; Low power consumption and, as a result, long working time; Low cost compared to similar models on the market; Compact dimensions; Manufacturer's warranty – 12 months; The device is included in the state register of measuring instrument RU.C.27.004.A No. 36079 dated 01.09.2009 and has undergone a verification procedure. Magnetometer MX-10 (milliteslameter) it is also included in the register of measuring instruments, test equipment and measurement methods used in JSC "Russian Railways". Scope of application 1. Verification of the magnetization modes of controlled parts using permanent magnets, rectified current electromagnets by the applied field method, as well as during the control by the residual magnetization method, by measuring the tangential and normal components of the magnetic field strength vector at one or more points on the surface of these parts. The number of points at which the magnetic field strength is measured and their location on the controlled surface depend on the shape of the part, as well as on the type and design of the magnetizing device used. 2. Control of the magnetization of parts before welding. During electric arc welding of non-magnetized parts, the effect of "magnetic blowing" is observed, i.e. the deviation of the electric arc from the axis of the electrode, the wandering of the arc end along the product, which leads to metal splashing during welding, deterioration of the seam quality. Therefore, before welding, it is necessary to measure the level and direction of magnetization of the parts and demagnetize them if necessary. 3. Verification of the residual magnetization after magnetic powder inspection. Demagnetization and verification of the residual magnetization of responsible, rubbing parts, as well as parts in contact with them after assembly, is prescribed in the requirements of the IPC and is a technological stage of control. 4. Magnetization control before assembling various structures. Magnetized parts can affect the operation of automation devices, cause errors in the readings of instruments, equipment. Magnetization can cause the accumulation of wear products in the movable joints, cause a negative effect on subsequent technological operations. Due to possible undesirable consequences, the parts are demagnetized and the quality of their demagnetization is checked. 5. Control of gas and water meters. Housing and utilities enterprises may also be interested in the device. It is known that existing gas or water flow meters can be easily "deceived" with the help of strong permanent magnets that reduce the rotation speed of the flow sensors. There are different ways to detect such theft. One of them is the control of the residual magnetization of the counters using magnetometers. The measured value should not significantly exceed the Earth's magnetic field, otherwise it can be concluded that there was unauthorized interference with the operation of the device. Main technical characteristics Measuring range, MT from 0.1 to 100 The limits of the permissible basic absolute measurement error, MT D = 0.02 VI + 0.05, where VI is the magnetometer readings in MT Power supply battery type: PP3 (nine-volt battery) Consumption current, mA, no more than 15 Duration of continuous operation (from fully charged batteries), h, at least 20 Overall dimensions, mm: – electronic unit (LxWxH) 120x60x25 – Measuring transducer (Diameter x Length) 18x173 Weight, g, not more than 160 Ambient operating temperature, °C -10...+40
Produced in: Moscow