Catalog
Search
3937 products
View:
- Selected: 0Foreign brand
- Selected: 0By name of foreign product
- Selected: 0Item names
- Selected: 0Russian analogue
- Selected: 0Areas of use
View:
3937 products
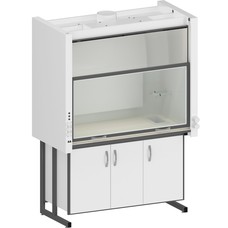
Fume Cupboard SHV-NRZH.150
Overall dimensions with raised protective screen 1505x800x2270 mm
Overall dimensions with lowered protective screen 1505x800x2100 mm
The diameter of the exhaust pipe is 200 mm
Weight 245 kg
Power supply 220 V, 50 Hz, 16 A
Termeks
Tomsk
Produced in: Tomsk
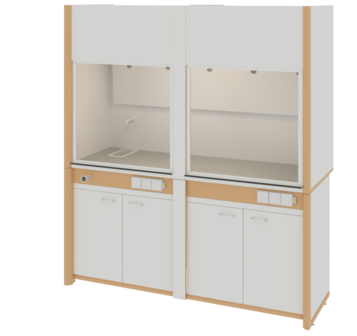
Exhaust cabinet LAB-1800 SHVT-N
Working surface: TRESPA TopLab 6mm, on a substrate of wood-containing material (plywood 15mm, melamine 16mm).
Length, mm: 1838
Depth, mm: 726
Height, mm: 2100
equipment
Working box
front anti–spill side - TRESPA TopLab
sink-drain (polypropylene, internal size 250*100*150mm), water pipe
the package includes
a siphon
gofroslang
two flexible eyeliners 1200mm long
melamine body 16mm thick
2 lifting screens with the possibility of fixing at any height – tempered glass with a thickness of 5mm, lifting 0-700mm, increase the height of the cabinet at full lifting by 450mm
LOIP
Saint Petersburg
Produced in: Saint Petersburg
Exhaust cabinet for washing dishes LAB-PRO SHVM 150.74.230 TR
BASIC EQUIPMENT
Working box
guide posts – aluminum profile painted with powder paint (RAL 7035/RAL 5023) in the right rack there is a light switch
front anti–spill side - acid-resistant polished stainless steel AISI 304
side panels – tempered glass
2 dependent lifting screens – tempered glass in aluminum frames, lifting 0-780mm, do not change the dimensions of the cabinet when lifting
the upper fixed screen – metal painted with powder paint (RAL 5023) with the texture of shagreen leather
back and top panels – polypropylene
on the top panel:
LED lamp dust- and moisture-proof 10W IP65
switching box with automatic emergency shutdown power supply 16A
flange d=250mm (the distance from the back panel to the center of the flange is 170mm)
easily removable exhaust canopies
3 exhaust levels (lower, side and front)
counterweights are placed in the front pylon racks and are easily serviced
Frame base
metal pedestal painted with powder paint (RAL 7035) with the texture of shagreen leather
facades – laminated MDF with a thickness of 16mm
handles – polypropylene
2 compartments with locks
1 shelf with the possibility of installation on three levels in any of the compartments (when the cabinet is equipped with 2 bowls, shelves are not included)
flange d=100mm
service panel – aluminum profile painted with powder paint (RAL 5023) with the texture of shagreen leather:
adjustable supports
LOIP
Saint Petersburg
Produced in: Saint Petersburg
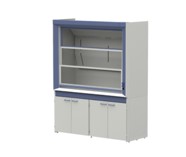
Exhaust cabinet for working with LVZH LAB-PRO SHVLVZH 150.74.230 KG
BASIC EQUIPMENT
Working box
the front guide posts are aluminum profile painted with powder paint (RAL 7035/RAL 5023), in the right rack there are a light switch and 2 splash–proof sockets with a 3.2kW cover (IP54)
the front anti-spill side is acid-resistant polished stainless steel. AISI 304 steel
rear, upper, side panels – metal painted with powder paint (RAL 7035) with the texture of shagreen leather
2 dependent lifting screens – tempered glass in aluminum frames, lifting 0-780mm, do not change the dimensions of the cabinet when lifting
the upper fixed screen – tempered glass in an aluminum frame
on the top panel:
4 anti-explosion the valve
lamp LED dust– and moisture-proof (2X10W IP65) is separated from the working space by tempered glass with a thickness of 4mm
flange d=250mm (the distance from the back panel to the center of the flange is 170mm)
switching box with automatic emergency power off 16A
easily removable exhaust visors
3 exhaust levels
on the rear panel:
4 holes d =22mm with plugs made of stainless steel for the installation of additional pipes or taps
technological hole d=50mm with a plastic plug
counterweights are placed in the front pillars-pylons and are easily serviced
Frame base
metal frame with a pedestal, painted with powder paint (RAL 7035) with a texture of shagreen leather:
double metal facades with a noise damper, opening angle 270°
handles – polypropylene
2 compartments with locks
1 shelf with the possibility of installation on three levels in any of the compartments
flange d=100mm
service panel – metal box painted with powder paint (RAL 5023) with the texture of shagreen leather:
adjustable supports
LOIP
Saint Petersburg
Produced in: Saint Petersburg
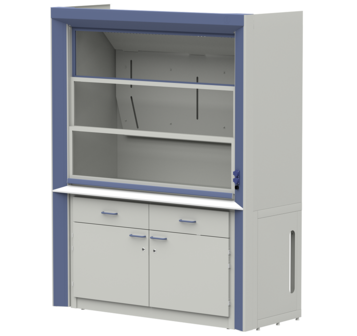
Exhaust cabinet for working with LVZH LAB-PRO SHVLVZH-TB 180.74.230 KG
BASIC EQUIPMENT
Working box
front guide posts – aluminum profile painted with powder paint (RAL 7035/RAL 5023), in the right rack there are a light switch and 2 splash–proof sockets with a 3.2kW cover (IP54)
the front anti-spill side is acid-resistant polished stainless steel. AISI 304 steel
back, top, side panels – metal painted with powder paint (RAL 7035) with the texture of shagreen leather
2 dependent lifting screens – tempered glass in aluminum frames, lifting 0-780mm, do not change the dimensions of the cabinet when lifting
the upper fixed screen – tempered glass in an aluminum frame
on the top panel:
4 anti-explosion valves
LED dust- and moisture-proof lamp (2X10W IP65) is separated from the workspace by tempered glass thickness of 4mm
flange d=250mm (distance from rear panel to the center of the flange – 170mm)
switching box with automatic emergency power off 16A
easily removable exhaust visors
3 levels of exhaust
on the rear panel:
technological hole d = 60mm with a plastic plug
counterweights are placed in the front pillars-pylons and are easily serviced
Frame base
collapsible frame made of rectangular metal profile painted with powder paint (RAL 7035) with the texture of shagreen leather
front pillars - aluminum profile painted with powder paint (RAL 7035/RAL 5023)
adjustable supports
LOIP
Saint Petersburg
Produced in: Saint Petersburg
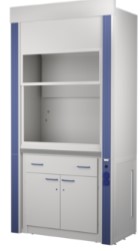
Exhaust cabinet for working with LVZH LAB-PRO SHVLVZH-TV 120.75.245 KG
BASIC EQUIPMENT
Working box
countertop, working surface – ceramic tile, resistant to concentrated acids, alkalis, organic solvents and high temperatures,color gray
front guide posts – aluminum profile painted with powder paint (RAL 7035/RAL 5023)
front anti–spill side - acid-resistant polished stainless steel. AISI 304 steel
rear, upper, side panels – metal painted with powder paint (RAL 7035) with the texture of shagreen leather
1 lifting screen – tempered glass in aluminum frames, lifting 0-670 mm, does not change the dimensions of the cabinet when lifting
the middle fixed screen – tempered glass in an aluminum frame
upper fixed screen – metal painted with powder paint (RAL 7035)
on the upper panel:
4 anti-explosion valves
LED dust- and moisture-proof lamp (2x10W IP65) is separated from the workspace tempered glass
flange Ø 250 mm (the distance from the back panel to the center of the flange is 170 mm)
3 exhaust levels
on the back panel:
4 holes Ø 22 mm with plugs made of stainless steel for installing additional pipes or taps
technological hole Ø 50 mm with a plug made of HPL plastic
counterweight is placed in the left pillar and easy to maintain
LOIP
Saint Petersburg
Produced in: Saint Petersburg
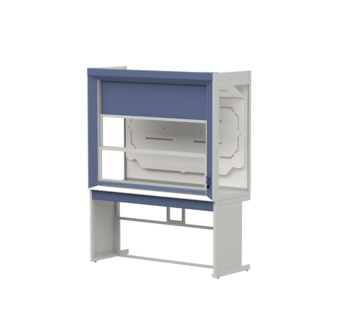
General purpose exhaust cabinet LAB-PRO SHV 180.74.230 TR
BASIC EQUIPMENT
Working box
guide racks – aluminum profile painted with powder paint (RAL 7035/RAL 5023)in the right rack there are a light switch and 2 splash-proof sockets with a 3.2kW cover (IP54)
the front anti–spill side is acid-resistant polished stainless steel AISI 304
side panels – tempered glass
2 dependent lifting screens – tempered glass in aluminum frames, lifting 0-780mm, do not change the dimensions of the cabinet when lifting
the upper fixed screen – metal painted with powder paint (RAL 5023) with the texture of shagreen leather
back and top panels –
polypropylene LED lamp dust- and moisture-proof (22W IP65)
switching box with automatic emergency power off 16A
flange d=250mm (the distance from the back panel to the center of the flange is 170mm)
easily removable exhaust visors
3 exhaust levels (lower, side and front)
counterweights are placed in the front pylon racks and are easily serviced
Frame base
collapsible frame made of rectangular metal profile painted with powder paint (RAL 7035) with the texture of shagreen leather
service panel - metal box painted with powder paint (RAL 5023) with the texture of shagreen leather:
adjustable supports
LOIP
Saint Petersburg
Produced in: Saint Petersburg
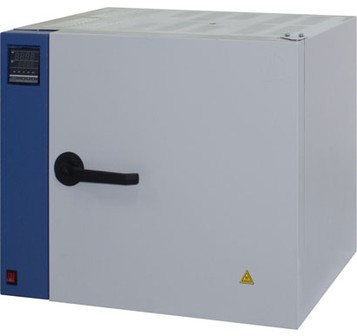
Drying cabinet LF-60/350-VS1
Design features:
Microprocessor temperature controller;
Four-sided heating;
Shut-off forced air circulation in the working chamber;
Camera material – stainless steel;
Bright LED display;
Conveniently located control panel;
LED indicators of heater operation and protection operation;
Alarm when the current temperature exceeds the limits of the permissible range;
Reliable door closing mechanism;
High-quality silicone sealer;
Highly efficient thermal insulation of the housing;
The case is made of high-quality sheet steel and painted with heat-resistant powder paint;
Number of shelves: standard – 2, maximum – 6.
Technical specifications:
Maximum heating temperature, °C +350
The error of reproducing the set temperature, ° C ± 3
Temperature maintenance error, ° C ± 1
Warm-up time to maximum temperature, no more, min 45
Dimensions of the working chamber, (WxHxD), not less than mm 340x365x370
Overall dimensions, (WxHxD), not more than 685x580x680 mm
Rated supply voltage, 220 V
Rated power, W 2200
LOIP
Saint Petersburg
Produced in: Saint Petersburg
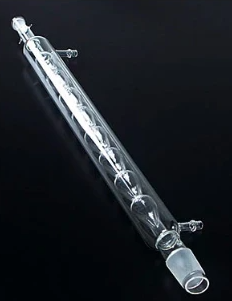
Refrigerator HSh-1-200 19/26 Primelab
from
804 ₽
1 supp.
The KhSh-1-200 19/26 Primelab refrigerator is suitable not only for cooling substances, but also for distillation, extraction, distillation, etc. Made from reliable and durable borosilicate glass, which is resistant to temperature changes. Suitable for working with chemically active and toxic substances. Cooling of the liquid occurs when it moves along the balls inside the refrigerator, as well as by supplying running water to the jacket. The refrigerator has excellent performance with a relatively small working part of 200 mm. The total length of the entire structure is 303 mm. It is equipped with core sections (19/26).
Primelab
Mytishchi
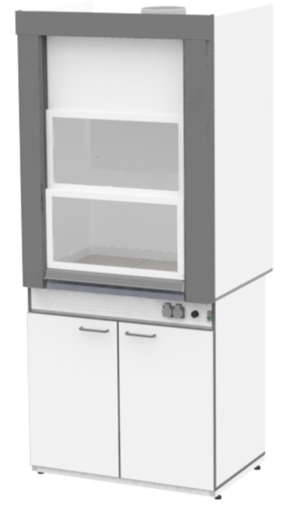
Exhaust cabinet LAB-M SHV 90.74.210 KG
Furniture for laboratory work.
Exhaust cabinet made of chipboard
Working surface: Porcelain stoneware (ceramic tile 300*300mm), stitching - epoxy compound
Overall dimensions:
Length, mm: 900
Depth, mm: 740
Height, mm: 2100
equipment
Working box
front anti–spill side - acid–resistant polished stainless steel AISI 316
housing - white chipboard with a thickness of 16mm
guide posts – aluminum profile painted with powder paint dark gray (RAL 7011)
2 dependent lifting screens – tempered glass in aluminum frames, lifting 0-710mm, do not change the dimensions of the cabinet when lifting.
LOIP
Saint Petersburg
Produced in: Saint Petersburg
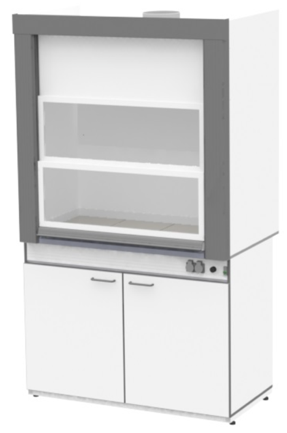
Exhaust cabinet LAB-M SHV 120.74.210 F20
Furniture for laboratory work.
Exhaust cabinet made of chipboard
Working surface: FRIDURIT (20 mm)
Overall dimensions:
Length, mm: 1200
Depth, mm: 740
Height, mm: 2100
equipment
Working box
front anti–spill side - acid–resistant polished stainless steel AISI 316
housing - white chipboard with a thickness of 16mm
guide posts – aluminum profile painted with powder paint dark gray (RAL 7011)
2 dependent lifting screens – tempered glass in aluminum frames, lifting 0-710mm, do not change the dimensions of the cabinet when lifting.
LOIP
Saint Petersburg
Produced in: Saint Petersburg
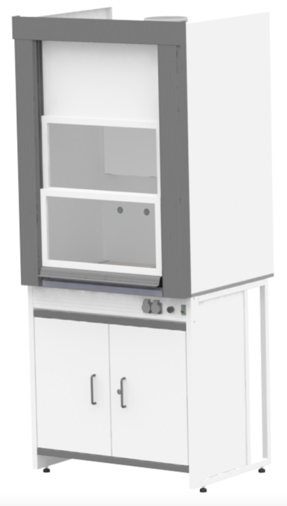
Exhaust cabinet LAB-M SHV ME 90.74.210 TR
Furniture for laboratory work.
All-metal exhaust cabinet
Working surface: Trespa TopLab 6mm, on a substrate of wood-containing material (plywood 15mm, melamine 16mm).
Overall dimensions:
Length, mm: 900
Depth, mm: 740
Height, mm: 2100
equipment
Working box
front anti–spill side - acid–resistant polished stainless steel AISI 316
housing - metal painted with white powder paint (RAL 9016)
guide posts – aluminum profile painted with dark gray powder paint (RAL 7011)
2 dependent lifting screens – tempered glass in aluminum frames, lifting 0-710mm, do not change the dimensions of the cabinet when lifting.
LOIP
Saint Petersburg
Produced in: Saint Petersburg
