Search

210 products
View:
  • Selected: 1
    Applying
  • Selected: 0
    Names
    Loading...
  • Selected: 0
    Manufacturer
    Loading...
  • Selected: 0
    Made in
    Loading...
  • Selected: 0
    Additional
    Loading...
All filters
  • Applying
  • 81
    Names
    Loading...
  • 30
    Manufacturer
    Loading...
  • 18
    Made in
    Loading...
  • 47
    Additional
    Loading...
View:
210 products
CD-1 Paint detector of defects 220V
from 50 000 ₽
The principle of operation: The controlled extended product (pipe, rolled or wire) is passed through the working area of the flaw detector. When a defective area is detected, the flaw detector included in the automated system sends a signal to trigger the paint meter actuator, as a result of which the paint from the marker's aerosol can is applied to the surface of the controlled product through a window in the device housing. Features and benefits: - Any standard aerosol cans with a diameter of 68 mm can be used in the flaw detector; - Easy replacement of the cylinder; - The device does not require connection to the pneumatic line; - High performance; - The design of the CD-1 defect meter allows connection to any standard AC and DC electrical networks with rated voltages from 12 to 380 V. Scope of application: The CD-1 automatic paint sprayer is an auxiliary equipment and is used in conjunction with flaw detectors as part of in–line automated lines for marking defects in quality control of extended products made of various materials, ferrous and non-ferrous metals and alloys - welded, hot-rolled and cold-drawn pipes, rolled products, wire and products made of them. The flaw detector can be used both in the production process and during input control on the consumer side at machine-building, transport, chemical and oil and gas enterprises. *Custom-made versions for rated voltages can be of: 12, 24, 48, 110, 127, 220, 380V.
Produced in: Moscow
MTP-01 Magnetic Coating Thickness Gauge
from 75 000 ₽
Measuring range of thickness of protective coatings, mm: from 0.2 to 10 Digital display of measurement results: yes Power supply: from a PP3 type battery with a voltage of 9V Power consumption, MW: 100 Operating mode setting time, min: 1 Time of one measurement, sec: 3 Memory capacity, number of thickness values: 2000 Overall dimensions, mm: - electronic unit (width-depth length) 120x60x25 - measuring transducer (diameter height) 33x23 - connecting cable (length) 1500±300 Weight, g, no more: - electronic unit (without battery power) 80 - measuring converter 40 The kit includes: - Electronic unit, - Measuring converter - Plate made of non-magnetic material for setting the upper limit of measurements - Battery type PP3 - CD-ROM with the program - Prism - Cover - Spring - Case - Passport - Operation Manual
Produced in: Moscow
UFO-3-20F UV Irradiator
from 49 000 ₽
The principle of operation of the device The principle of operation of the irradiator is based on the conversion of DC electrical energy into a normalized flow of ultraviolet radiation in the optical wavelength range of 350 ... 400 nm with a maximum at a wavelength of 365 nm. Design features and advantages The irradiator is a lantern consisting of an ultraviolet diode placed behind the focusing system, connected to a DC voltage converter, which supports the optimal mode of starting and functioning of the LED. Structurally, the irradiator is made in a lightweight duralumin housing, in the front of which there is a focusing system with an ultraviolet LED. The housing is equipped with a carrying strap. There is also a power on/off button on the case. As the power source of the irradiator, a lithium-ion battery of type 18650 with a nominal voltage of 3.7 V or 3 AA batteries with a voltage of 1.5V. are used. An ultraviolet LED is used as a source of ultraviolet (UV) radiation. The use of an LED distinguishes the UFO-3-20F irradiator from similar devices using UV lamps, it provides: high reliability and durability; variable diameter of the UV radiation zone; low current consumption and long continuous operation time; instant readiness for the first and subsequent turn-on; low weight, compact; high radiation intensity; stability of the characteristics of the irradiator, both during operation and throughout its entire life; wide operating temperature range. Scope of application The UV-3-20F irradiator (lantern) is used for ultraviolet irradiation of the surface of various parts, assemblies and mechanisms during flaw detection by fluorescent methods of non-destructive testing at machine-building enterprises, chemical and petrochemical industries, railway, automobile, water and aviation transport, during the laying and operation of pipelines, in construction, agriculture. The device can be used to check the quality of welds and internal surfaces of closed tanks. The luminescent method makes it possible to ensure high brightness and contrast of the indicator pattern, and, consequently, high sensitivity, especially on parts and products with a dark surface. Technical specifications The range of radiated wavelengths, nm 350...400 Ultraviolet irradiation at a distance of 300 mm, W/m2, not less than 20000 with a diameter of the irradiated area of 100 mm not less than 2000 Power supply from a lithium-ion battery type 18650 voltage of 3.7 V, or 3 AA batteries with a voltage of 1.5V Continuous operation time without recharging the battery, h, at least 4 Maximum irradiance at the wavelength, 365 nm Dimensions (diameter x length) 40 x 150 Weight (without batteries), kg, not more than 0.2
Produced in: Moscow
VD-20NF Eddy Current Flaw Detector
The principle of operation of the VD-20NF eddy current flaw detector The principle of operation of the VD-20NF flaw detector is based on the generation of eddy currents on the surface of the controlled part and subsequent analysis of the signal at the output of the converter, which correlates with the characteristics of the active secondary field. The device consists of two main blocks: electronic one and electromechanical one, in which an eddy current converter of transformer type is installed. The controlled products (bearing rollers) enter through the input tray into the electromechanical unit of the flaw detector, where they move sequentially and fall under the pressure rollers of the overhead converter holder. The clamping mechanism is adjusted to each size of the rollers, so as to ensure tight contact with the curved surface and fix the tip of the transducer at the required distance from it. The detection of defects occurs due to the imbalance of the converter when it is located above the surface of the controlled product, caused by the interaction of the primary electromagnetic field generated by the converter with the secondary electromagnetic field of eddy currents induced in the controlled product by the primary field. When cracks are detected, the electronic unit of the flaw detector gives sound and light warning signals, and also triggers the electromagnet of the sorter, which directs the controlled roller into the tray for defective products. In the absence of defects, the controlled roller is directed towards the output tray of the flaw detector. Design features and advantages The VD-20NF eddy current flaw detector is equipped with removable input and output trays, power-on switches and a drive for feeding controlled products to the converter, as well as handrails for convenient transportation of the unit. The mechanisms of the electromechanical unit are protected by a frame made of steel plates. The electronic unit of the flaw detector is portable and can be installed both on the top panel of the electromechanical unit and on the surface of the desktop. Controls and indications of defect detection are located on the front panel of the electronic unit. The delivery package also includes a power adapter for the electronic unit and a tuning sample. The advantages of the VD-20NF flaw detector include: high reliability (the service life of the flaw detector is more than 10 years); it is easy to set up and operate; it has several types of defect detection alarms; the high probability of detecting defective products (at least 99.9%); low number of false positives (less than 5%). Scope of application According to the current standards of safety and product quality control during repair work in locomotive depots and repair plants, bearing rollers that have passed visual inspection and are recognized as suitable for further operation according to the criteria of geometry and condition of the working surface are subject to mandatory additional control using eddy current flaw detection to detect fatigue cracks invisible during visual inspection on the rolling surface of the rollers. The VD-20NF eddy current flaw detector allows for quality control and automatic disassembly of bearing rollers of various shapes and sizes both in laboratory and factory conditions in full compliance with the requirements of the regulatory documents of Rosstandart and the methods of performing control measurements used in JSC "Russian Railways".
Produced in: Moscow
MX-10 Magnetometer
MX-10 Magnetometer
from 67 000 ₽
The MX-10 magnetometer is an auxiliary tool for conducting magnetic powder control using permanent magnets, rectified current electromagnets by the applied field method, as well as for monitoring by the residual magnetization method according to the requirements of the current regulatory documentation. The MX-10 magnetometer meets the requirements in the field of non-destructive testing for the main industries: nuclear, energy, oil and gas complex, general and special engineering, railway transport, aerospace industry, elevator and crane facilities, etc. Magnetometer MX-10 is an electronic measuring unit with a remote measuring converter, which is based on the Hall effect. The design of the device allows measuring both the normal and tangential component of the magnetic induction vector directly on the surface of the part. The measured value of the magnetic field induction value is displayed on the digital indicator of the electronic unit. Features and Benefits The updated version of the MX-10 magnetometer has a modern element base, which has significantly improved its performance, reduced error and expanded the measurement range (see the Table of Technical characteristics). The device is capable of operating in two modes: Constant measurement mode. This is convenient when carrying out a large number of measurements over a short period of time. Automatic shutdown mode 1 minute after measurement. It allows you to save the charge of the device, which is especially important in the field. A thermal compensation circuit ensures stable measurement readings at any temperature change. Other features include: The small dimensions of the Hall measuring transducer for the MX-10 magnetometer make it possible to measure the induction of the magnetic field in grooves, grooves, angular transitions, i.e. in those areas of the controlled product that are stress concentrators and are most dangerous from the point of view of cracking; A wide range of measurements of the magnitude of the magnetic field induction; The smallest measurement error among analogues in the entire operating temperature range; Convenience of measurement by a remote measuring transducer in various planes; Low power consumption and, as a result, long working time; Low cost compared to similar models on the market; Compact dimensions; Manufacturer's warranty – 12 months; The device is included in the state register of measuring instrument RU.C.27.004.A No. 36079 dated 01.09.2009 and has undergone a verification procedure. Magnetometer MX-10 (milliteslameter) it is also included in the register of measuring instruments, test equipment and measurement methods used in JSC "Russian Railways". Scope of application 1. Verification of the magnetization modes of controlled parts using permanent magnets, rectified current electromagnets by the applied field method, as well as during the control by the residual magnetization method, by measuring the tangential and normal components of the magnetic field strength vector at one or more points on the surface of these parts. The number of points at which the magnetic field strength is measured and their location on the controlled surface depend on the shape of the part, as well as on the type and design of the magnetizing device used. 2. Control of the magnetization of parts before welding. During electric arc welding of non-magnetized parts, the effect of "magnetic blowing" is observed, i.e. the deviation of the electric arc from the axis of the electrode, the wandering of the arc end along the product, which leads to metal splashing during welding, deterioration of the seam quality. Therefore, before welding, it is necessary to measure the level and direction of magnetization of the parts and demagnetize them if necessary. 3. Verification of the residual magnetization after magnetic powder inspection. Demagnetization and verification of the residual magnetization of responsible, rubbing parts, as well as parts in contact with them after assembly, is prescribed in the requirements of the IPC and is a technological stage of control. 4. Magnetization control before assembling various structures. Magnetized parts can affect the operation of automation devices, cause errors in the readings of instruments, equipment. Magnetization can cause the accumulation of wear products in the movable joints, cause a negative effect on subsequent technological operations. Due to possible undesirable consequences, the parts are demagnetized and the quality of their demagnetization is checked. 5. Control of gas and water meters. Housing and utilities enterprises may also be interested in the device. It is known that existing gas or water flow meters can be easily "deceived" with the help of strong permanent magnets that reduce the rotation speed of the flow sensors. There are different ways to detect such theft. One of them is the control of the residual magnetization of the counters using magnetometers. The measured value should not significantly exceed the Earth's magnetic field, otherwise it can be concluded that there was unauthorized interference with the operation of the device. Main technical characteristics Measuring range, MT from 0.1 to 100 The limits of the permissible basic absolute measurement error, MT D = 0.02 VI + 0.05, where VI is the magnetometer readings in MT Power supply battery type: PP3 (nine-volt battery) Consumption current, mA, no more than 15 Duration of continuous operation (from fully charged batteries), h, at least 20 Overall dimensions, mm: – electronic unit (LxWxH) 120x60x25 – Measuring transducer (Diameter x Length) 18x173 Weight, g, not more than 160 Ambient operating temperature, °C -10...+40
Produced in: Moscow
MS-10 Magnetic Structuroscope
from 270 000 ₽
Distinctive features: - Non-destructive testing of strength, plasticity and viscosity of parts and structures made of ferromagnetic steels and cast iron according to the following standards: GOST 30415-96, OST 14-1-184-65, TU-14-1016-74 - Non-destructive testing of the depth and hardness of surface-hardened layers on steel and cast iron parts; - Quality control of low-temperature tempering of cutting and measuring tools, bearing steels; - Control of uniaxial elastic stresses; - Control of the uniformity of the properties of massive parts. Technical specifications: The range of coercive force of the material of the controlled products, A/cm, is 1.0...60. The limit of the permissible basic absolute error of measurements of the coercive force (Ns) on standard samples at a normal ambient temperature of 20 ± 5°C does not exceed the values of 0.1+0.04 Ns (Ns stands for the measured value of the coercive force of the standard sample). This error probability is provided with a gap between the converter and the surface of the controlled product not exceeding 0.5 mm. Basic version: The structroscope is powered by a battery. Extended version: It is possible to work on 220V/50Hz grid. The time of setting the operating mode after power on, min: no more than 2 Time of one measurement, sec: no more than 6 Continuous operation time (without recharging), h: at least 16 Internal memory: up to 512 series of 512 measurements each with the possibility to view the results Operating temperature range: -20°C to +40°C; Overall dimensions, (length x width x thickness), mm: electronic unit: 190x140x80 converter: 135x75x100 Weight, kg: the electronic unit with a battery: 2.3 ± 0.05 the converter: 1.3± 0.05 Basic version kit: Ia5.173.023 Electronic unit: 1 pc. Ia5.125.061 Converter: 1 pc. Ia8.896.121 Control sample of coercive force (plate PN-1): 1 pc. Ia8.896.122 Control sample of coercive force (plate PN-2): 1 pc. Bag-case: 1 pc. Charger: 1 pc. Ia2.778.042 RE Operating Manual: 1 copy. Ia2.778.042 FO Form: 1 copy. Ia2.778.042 MP Verification instructions: 1 copy. Extended version: Additionally, it can be equipped with a Bluetooth® module for communication with a PC and software for receiving and processing data. It can also be equipped with a small-sized converter.
Produced in: Moscow
VD-90NP Eddy current flaw detector in the basic configuration
from 295 000 ₽
The principle of operation of the device: The principle of operation of the flaw detector is based on the excitation of eddy currents in the controlled product and the subsequent release of a signal at the output of the converter, the amplitude and phase of which are determined by the secondary field of eddy currents. Design features and advantages of the VD-90NP flaw detector. The device has a small-sized case, which ensures its lightness, ergonomics and allows you to mount it on your belt or on your arm. The measurement is performed using a remote converter connected by a flexible cable. There are several types of converters for eddy current flaw detection of products made of different materials and different geometries. The large and bright display displays the selected operating modes and measurement results in text and graphic form. The VD-90NP is also characterized by: high sensitivity (it detects cracks starting from 0.1 mm in size); dust–and-moisture-proof housing, which makes it applicable for work in the field; large operating frequency range; maximum working clearance up to 10mm; Bluetooth connection; the ability to control products with high surface roughness, up to Rz320 class; light and sound indication of defect detection; wide operating temperature range from –30°C to +50°C; autonomous low-voltage power supply; long continuous operation time from one set of batteries; compliance with the standard GOST R ISO 15549-2009 (ISO 15549:2008). The use of a microprocessor-based hardware and software platform provide it with the following operational characteristics: automatic adjustment when measuring conditions change, including compensating the influence of the gap; built-in calibration modes; saving the measurement results in the internal memory of the device; a large number of stored programs: sets of parameters and measurement modes, both preset and saved by the user so as to repeatedly monitor the same type of products; The Bluetooth 2.0 wireless communication module allows the device to be used in conjunction with an external laptop or mobile device for remote control, transmission of measurement results for further storage, printing, documentation and analysis. Scope of application: The eddy current method is suitable for non-destructive testing and detection of microcracks in products and parts made of any metals and alloys of complex shape, with high surface roughness, through non-conductive coatings, as well as for checking welded joints. The flaw detector can be used to control parts and assemblies of aviation equipment. The VD-90NP eddy current flaw detector is used for quality control and preventive examination of: - components and parts of rolling stock at railway transport enterprises: wheel sets, auto coupler housings, side frames, spring beams, labyrinth rings, pulleys; - pipes, profiles, rods at rolling mills at the output control, and at the input control of consumers of products; - products made of aluminum and titanium alloys with multilayer coatings at enterprises of the aviation and aerospace industry; - cables, beams, critical components of equipment (cranes, lifts) in construction; - main pipelines in order to detect stress corrosion. A wide range of operating temperatures, dust and moisture protection (IP54 degree of protection), autonomous low-voltage power supply, a long time of continuous operation of the device allows it to be used in the field at low temperatures and under precipitation (rain, snow). Basic kit: • 1 electronic unit for the VD-90NP eddy current flaw detector; • 1 Ia5.125.052 (Type-2) eddy current converter; • 1 converter cable; • 1 charger with batteries; • 1 hand strap; • 1 Ia8.896.104 sample with artificial defects; • 1 Ia8.896.035 coating sample; • 1 storage and carrying case; • 1 documentation set.
Produced in: Moscow
TL-1MP Eddy Current Thickness Gauge
from 965 000 ₽
The principle of operation of the electroplating thickness gauge: A converter with an induction coil on a ferrite core generates a high-frequency signal (frequency 1 MHz), which is used to create an alternating magnetic field. As the converter approaches the conductive surface, an alternating magnetic field creates eddy currents, the magnitude of which depends on the characteristics of the metal base and the thickness of the coating. In turn, eddy currents create their own electromagnetic field, which can be received by an induction coil. The resulting signal enters the amplitude detector, after which it is transmitted to the processing unit, where it is digitized and displayed on the device readout. In addition to signal conversion, the processor is used to set the required gain, as well as the initial voltage offset, depending on the characteristics of the materials in the controlled object. Features of the device design and advantages of the measurement method The TL-1MP eddy current thickness gauge consists of an electronic unit with a display, a power supply and a converter. The device is controlled using four buttons located on the front panel of the electronic unit. The converter can be disconnected from the electronic unit during transportation or for convenience of storage. The advantages of the device include: - convenience and ease of operation; - small size and light weight, allowing the TL-1MP to be used in difficult conditions with limited access to the controlled area of the facility; - high measurement accuracy; - factory setting of the measuring instrument to the customer's requirements; - high degree of localization of defects due to the small size of the converter. Scope of application: The service life of metal parts and components of mechanisms used in mechanical engineering is largely determined by their resistance to corrosion and surface wear. However, not all metals are sufficiently resistant to external destructive influences. Therefore, various electroplating coatings made of zinc, nickel, chromium, cadmium, tin, copper, silver and other metals are used to protect them. Even small fluctuations in the thickness of protective coatings can significantly affect the performance characteristics of parts, their service life, and interaction with other components. Therefore, measuring the thickness of the metal coating applied by the electrochemical method is important when conducting quality control of products. The use of the TL-1MP eddy current thickness gauge allows non-destructive quality control of electroplating coatings on the surface of metal parts in mass production conditions with special requirements for product quality. The device detects even small mechanical defects, the effects of abrasion, erosion, corrosion on the surface. Due to its ease of use, efficiency and reliability, eddy current thickness measurement is a standard method of quality control of products with electroplated coatings in such industries as mechanical engineering, aerospace industry.
Produced in: Moscow
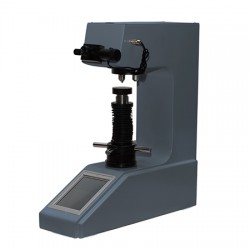
Metolab 421 Vickers Hardness Tester
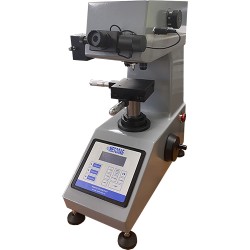
METOLAB 421 is a stationary Vickers hardness tester with an automatic loading system and digital display, designed to measure hardness parameters according to the specified method in accordance with GOST R ISO 6507-1-2007 of materials such as steel, cast iron, non–ferrous metals, soft alloys, etc. The stationary METOLAB-421 hardness tester is equipped with an electronic switch of the magnitude of the applied load, as well as allows you to enter diagonal length values from the control panel, followed by automatic calculation of hardness. The METOLAB 421 hardness tester has high accuracy and repeatability of results, a wide range of measurements. The device is included in the State Register of Measuring Instruments of the Russian Federation (GRSI) and comes with a certificate of primary verification (on request). The entry number in the GRSI is 67656-17. Distinctive features of the stationary METOLAB 421 Vickers hardness tester: Simple and intuitive control system; Wide range of measured values – from 5 to 2500 HV; Wide range of test loads: 0.3 kg (2.94 N); 0.5 kg (4.9 N); 1 kg (9.8 N); 2 kg (19.61 N); 3 kg (29.4 N), 5 kg (49 N), 10 kg (98 N); The price of dividing the scale of the reference microscope: 0.5 microns at 200x, 1 microns at 100x; The stationary METOLAB 421 hardness tester is equipped with an electronic switch of the magnitude of the applied load; A bright and clear LCD display provides a display of the selected scale, the set load, exposure time, test mode and other service information; The METOLAB 421 device is equipped with an electromechanical drive for applying and removing the main load; High accuracy and repeatability of measurements. Basic delivery package: Stationary METOLAB 421 hardness tester; Standard Vickers hardness test - 2 pcs.; Flat desktop; V-shaped desktop; 10x micrometer; 10x and 20x microscope lenses; Diamond indenter with an angle at the top of 136°; User Manual.
Metolab
Moscow
Produced in: Moscow
Metolab 603 Brinell Hardness Tester
METOLAB 603 is a stationary device designed to measure hardness by the Brinell method of various materials and products (steels, cast iron, non–ferrous metals, soft alloys, etc.). The METOLAB 603 hardness tester is a fully automatic device equipped with an electromechanical loading system, as well as an electronic load switch. Other features of the device include automatic focusing, a large and bright LCD display (on the device itself), full Russian interface. It is also worth mentioning that the basic package of delivery of the METOLAB 603 hardness tester includes a personal computer with software for the full processing of the information received. Due to its characteristics, the stationary Brinell hardness tester METOLAB 603 can be used in a wide variety of industries and production, as well as in educational institutions of various levels in the training of specialists. The stationary Brinell METOLAB 603 hardness tester is included in the State Register of Measuring Instruments of Russia (GRSI) and comes with a certificate of primary verification (on request). The number in the GRSI is 65684-16. Distinctive features of the stationary METOLAB 603 Brinell hardness tester: Carrying out measurements in fully automatic mode; Wide range of measured values, high repeatability of results; Simple and intuitive interface; Built-in electronic switch of the value of the applied load; LCD display with all the necessary information in Russian (on the device itself, in addition to the PC display); A digital micrometer that allows you to automatically read the hardness value without using conversion tables. The minimum price of dividing a micrometer is 0.00125 mm. Basic package of delivery: Stationary METOLAB 603 hardness tester; Personal computer (for detailed characteristics of the device, please contact our specialists); Micrometer; Indenter with carbide ball (10; 5; 2.5 mm) - 1 pc.; Large flat table; Small flat table; V-shaped table; Brinell hardness measures - 1 set; User Manual.
Metolab
Moscow
Produced in: Moscow
KRONA-12 Electric spark flaw detector
from 430 000 ₽
The flaw detector allows continuous monitoring of polymer, epoxy and enamel coatings of pipelines with a diameter from 219 to 1420 mm and selective control of polymer, epoxy, enamel and bitumen coatings of pipelines of any diameter. The flaw detector provides detection of local through defects of insulation coatings of pipelines with a dry surface. The flaw detector allows for continuous monitoring The flaw detector uses an electric spark control method. The flaw detector is designed to work at: - ambient temperature, °C: from minus 30 to plus 50; - relative humidity at a temperature of +25°C, %: 98; - atmospheric pressure, kPa: from 84.0 to 106.7. Technical specifications. Test voltage, kV: up to 40 Minimum diameter of detected defects, mm: 0.6±0.2 Operating temperature range, °C: -30...+50 Power supply -from the built-in 12V battery -from an external DC power supply current with a voltage of 12 V Continuous operation time, h: 8 Operating mode setting time, min: 1 Overall dimensions, mm, no more: - control and monitoring unit 200 x 158 x 91 - high voltage transformer 410x f90 Weight, kg, no more,: - control and monitoring unit 2.5 - high voltage transformer 1.5 Defect alarm light and sound The kit includes: Bag Suitcase Battery charger Earthing device Electronic Magnet Unit Probes for continuous monitoring- 5 pcs 0 – 400 mm; 1 – 650 mm; 2 – 735 mm; 3 – 840 mm; 4 – 980 mm. Probes for local control - 3 pcs VT-1 High voltage transformer Pin Probe extension Holder Bushing Nipple - 4pcs set of documentation (passport, manual, calibration)
Produced in: Moscow
Universal Metolab 703 Hardness Tester
Stationary universal METOLAB 703 hardness tester is a multifunctional device designed to measure the hardness of materials and products on the Rockwell, Brinell and Vickers scales. The device is a modification of the METOLAB 701 and METOLAB 702 meters. Among the features of the METOLAB 703 hardness tester, the following should be mentioned: a special force sensor for monitoring the applied load; a large and bright color display; software with many functions (including statistical ones – calculation of minimum/average/maximum values, conversion of the results into various scales, automatic switching on of the load, storing data in memory); U-disk for saving and transferring data; creating and editing spreadsheets in Excel format; digital calibration and much more. Distinctive features of the stationary universal multifunctional METOLAB 703 hardness tester: A large number of scales for measurements; Rockwell scales: A, B, C, D, E, F, G, H, K, L, M, P, R, S, V; Brinell scales: HBW1/5, HBW2.5/62.5, HBW1/10, HBW2.5/15.625, HBW1/30, HBW2.5/31.25, HBW2.5/62.5, HBW10/100, HBW5/125, HBW2.5/187.5; Vickers scales: HV5, HV10, HV20, HV30, HV50, HV100, HV12; Multifunctional software in the basic package; Fully Russian-language device menu, simple and intuitive interface; Wide range of measured values: 8 – 650 HB; 20 – 93HRA; 20 – 100 HRB; 20 – 70 HRC; 8 – 2900 H; Load application monitoring using a force sensor; Large and bright color display; Creating and editing spreadsheets in Excel format; U-disk for saving data; Digital calibration of the device; Built-in measuring microscope with backlight. Basic delivery package: Stationary universal METOLAB 703 hardness tester; Conical diamond Rockwell indenter (120° angle) - 1 pc.; Vickers diamond indenter (136° angle) - 1 pc.; Indenter with 1.5875 mm ball - 1 pc.; Indenter with 2.5 mm ball - 1 pc.; Indenter with 5.0 mm ball - 1 pc.; Indenter with 10.0 mm ball - 1 pc.; Large flat table 150 mm - 1 pc.; Medium flat table 60 mm - 1 pc.; V-shaped table 40 mm - 1 pc.; Hardness measures - 1 set; 15x microscope - 1 pc.; 2.5x lens - 1 pc.; 5.0x lens - 1 pc.; User Manual.
Metolab
Moscow
Produced in: Moscow